View Item Counts
This page allows you to view the amount of items in a category. To view items within a category, click ‘View’.

Posted in: setupinv
Leave a Comment (0) →Archive for setupinv
Posted in: setupinv
Leave a Comment (0) →|
Item Images Section
Navigation: Inventory Control > Edit Item > Item Images |
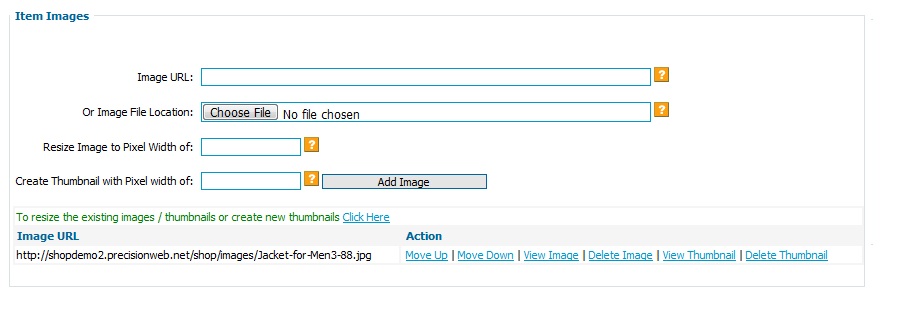 Item ItemImages Item Images are the images associated with an item. You are able to have multiple images, and you can create thumbnails (smaller images) for customers to see your item description better. Thumbnails also can be used for better browsing of items. Options for thumbnails are found on the ‘General Settings’ page. Options Thumbnails are smaller versions of the image. The shopping cart has differnt thumbnail If you are looking to create thumbnails for multiple items that |
Posted in: setupinv
Leave a Comment (0) →|
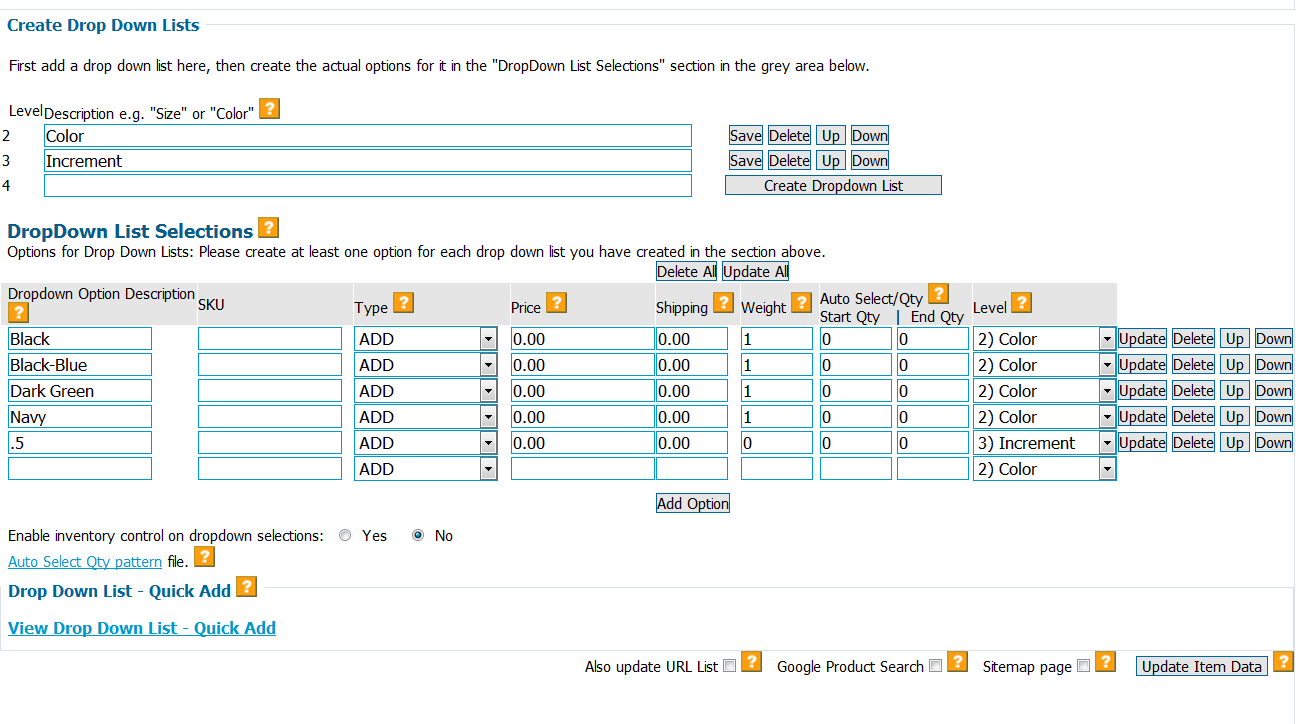
Drop Down Lists Selection
Navigation: |
|
Level Description Drop Down Lists Selections Dropdown Option Description Type Select ‘Add’ to have the the drop down option’s price, shipping, and weight Select ‘Subtract’ to have the the drop down option’s price, shipping, and weight Select ‘Override’ to have the the drop down option’s price, shipping, and weight Select ‘Multiply’ to have the the drop down option’s price, shipping, and weight Price Shipping For this to take effect, you would have to use the Shipping option "Base + Weight The weight will affect the item’s shipping cost if you are using one of these Auto Select/Quantity View the ‘Auto Select Qty pattern’ file below for an example. If a customer purchases the required quantity and the quantity discount in Level
One way to create a custom syntax is to navigate to: Import/Exports > Export |
Posted in: setupinv
Leave a Comment (0) →|
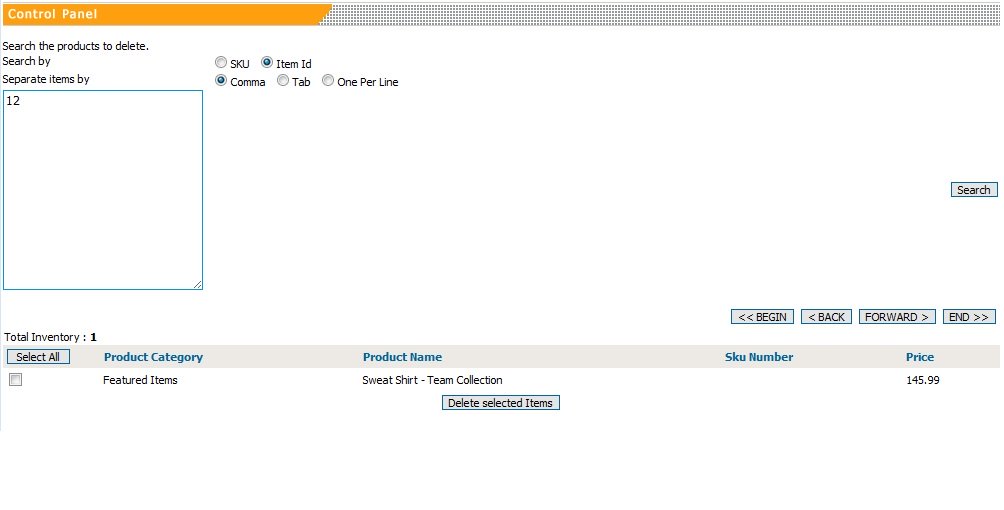
Multiple Item Delete This page allows you to delete multiple items at the same time.
|
|
Information If you need to delete an entire category worth of items, it is easier to Select the |
Posted in: setupinv
Leave a Comment (0) →|
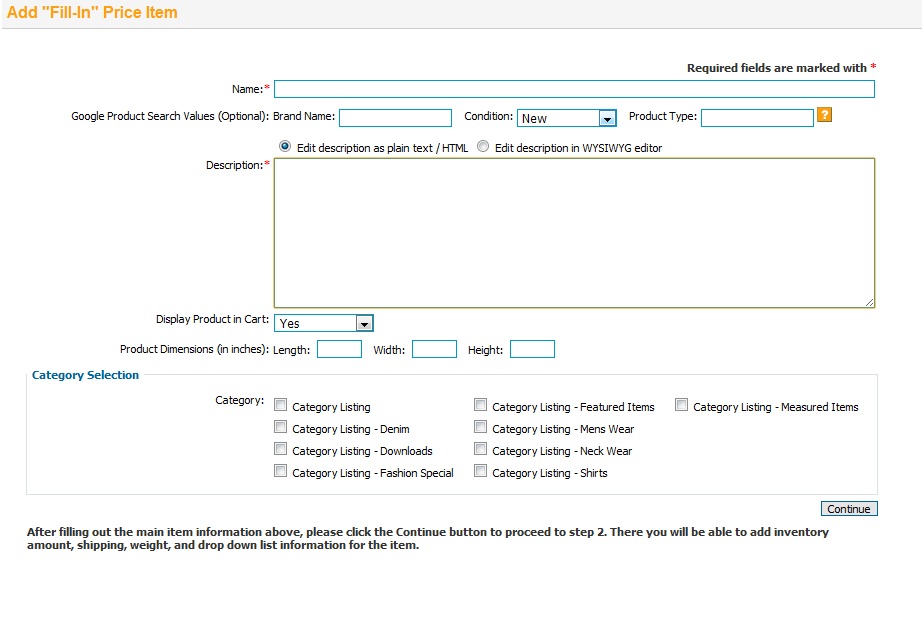
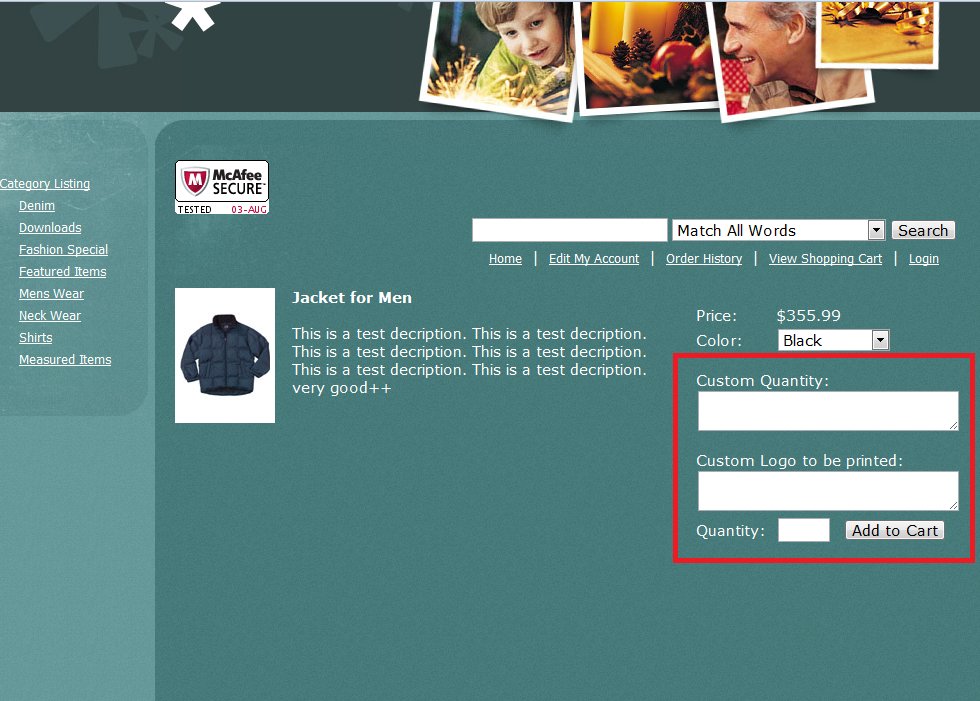
Add "Fill-In" Price Item The Fill-in price item allows shopper to specify the amount they will be paying. This is useful for donations, auction payments, or anywhere you need to
|
|
Description
Display Product in Cart If option is set to ‘Yes, this item is available throughout the shopping cart Product Dimensions
|
Posted in: setupinv
Leave a Comment (0) →|
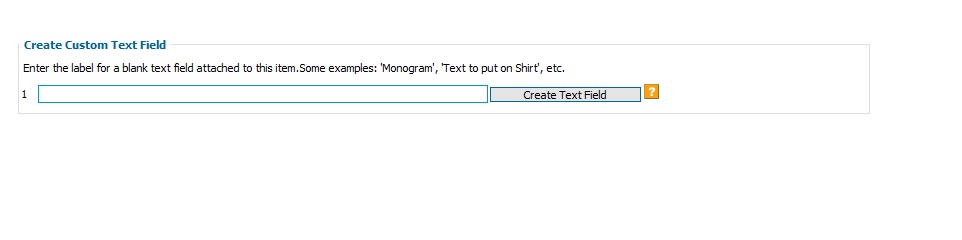
Create Custom Text Field Navigation: Inventory Control > Edit Item > Create Custom Text |
|
This field labels the blank text field
|
Posted in: setupinv
Leave a Comment (0) →
The reason you would |
|||
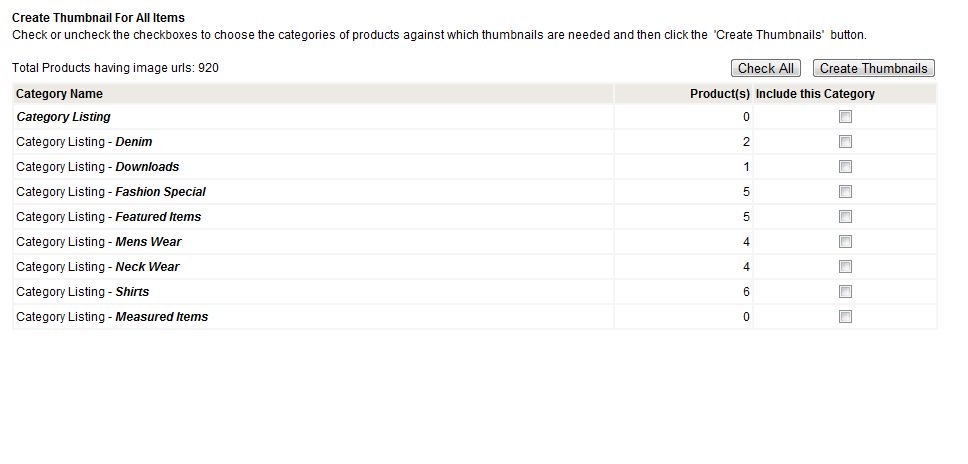 Create CreateThumbnail Options Choose the categories of products by checking the box next to the category you would like to create thumbnails for. Next, click the ‘Create Thumbnails’ button. |
|||
Posted in: setupinv
Leave a Comment (0) →|
Add Gift Certificate The Gift Certificate page allows you to create gift certificates for sale in your shopping cart. When a customer buys a gift certificate, the shopping cart will give them the gift certificate code on a certificate (for printing out) both on the confirmation page and in the email they receive. When the customer who purchased the gift certificate gives this gift certificate code to the final recipient, then that recipient is able to use that code on your checkout page to receive a credit for the gift certificate amount. Inventory > Inventory Main > Add Gift Certificate |
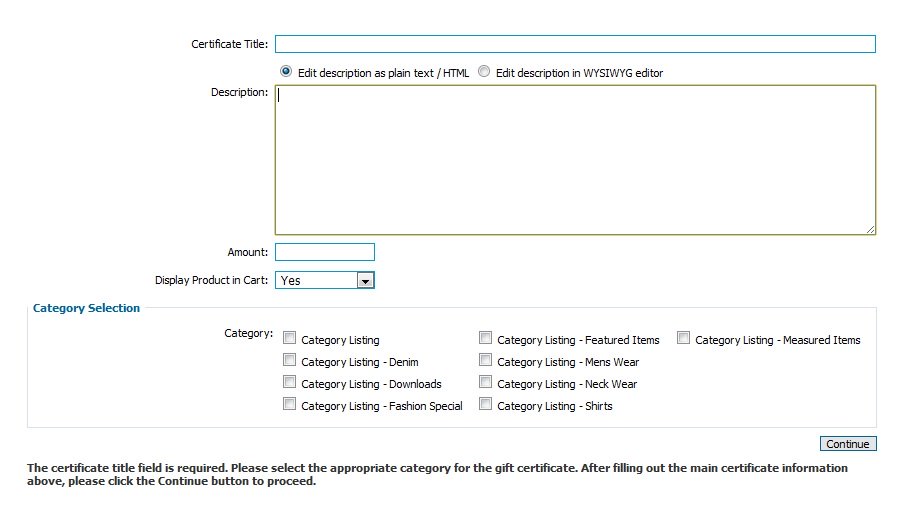 Add AddGift Certificate Options Certificate Title Create the Gift Certificate title. Description Enter the description of your product this field. The plain text / HTML option will allow you to enter plain text or HTML code. The WYSIWYG editor give you the option to edit the text in HTML format. Amount
If option is set to ‘Yes, this
|
Posted in: setupinv
Leave a Comment (0) →|
General Item Options
Navigation: Inventory Control > Edit Item > General Item Options |
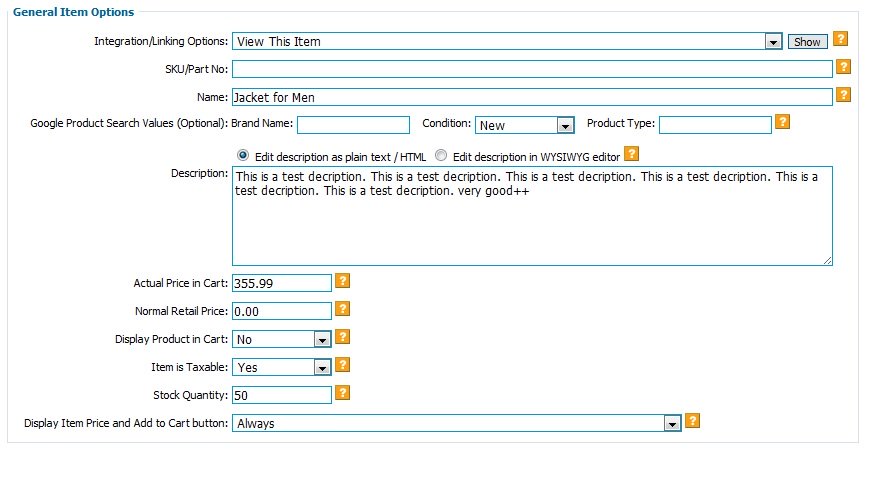 Integration/Linking Integration/LinkingOptions This feature will help you integrate your site. If you are not using the shop to show you items, and you would like to use your web pages to show items, this information will be particularly helpful. With the shopping cart’s import template feature, typically shop owners use the shop to display their items, which is what we recommend . However, you may find additional customization in using the shopping cart information on your actual pages.
‘HTML to display this ‘Item Include Code’ ‘View This Item’ lets you preview your item how it
‘Category Thumbnail Display |
|
Normal Retail Price Display Product in Cart If option is set to ‘Yes,
Google Product Search Values |
Posted in: setupinv
Leave a Comment (0) →Edit Item Page
This page allows you to edit an individual item options including:
| 1. General Item Options | 5. Create Custom Text Field |
| 2. Shipping (Item) | 6. Item Images |
| 3. Category Selection | 7. DropDown List selection |
| 4. Suggested Items Section | 8. Updating Item Data |
Posted in: setupinv
Leave a Comment (0) →