Android IMAP Email Setup with SSL / TLS
In the steps below we will use bob@your-store.biz as an example email account. Use your actual domain name in place of your-store.biz , your actual email address, and the actual user that corresponds to it.
In your browser you can see the server name within the web address / url by typing in [your actual domain name]/admin In this example that would be www.your.store.biz/admin And the server name would be: server105.secure-access.net
1. Click on the Email icon from your app list.
2. Click Add account, or Manage Accounts –> Add Account
3. Below where it says “Enter sign-in details”, enter in your email address and password. If you click to “Show Password” you will more easily be able to see what you are typing.
4. Click “Next”, Select IMAP account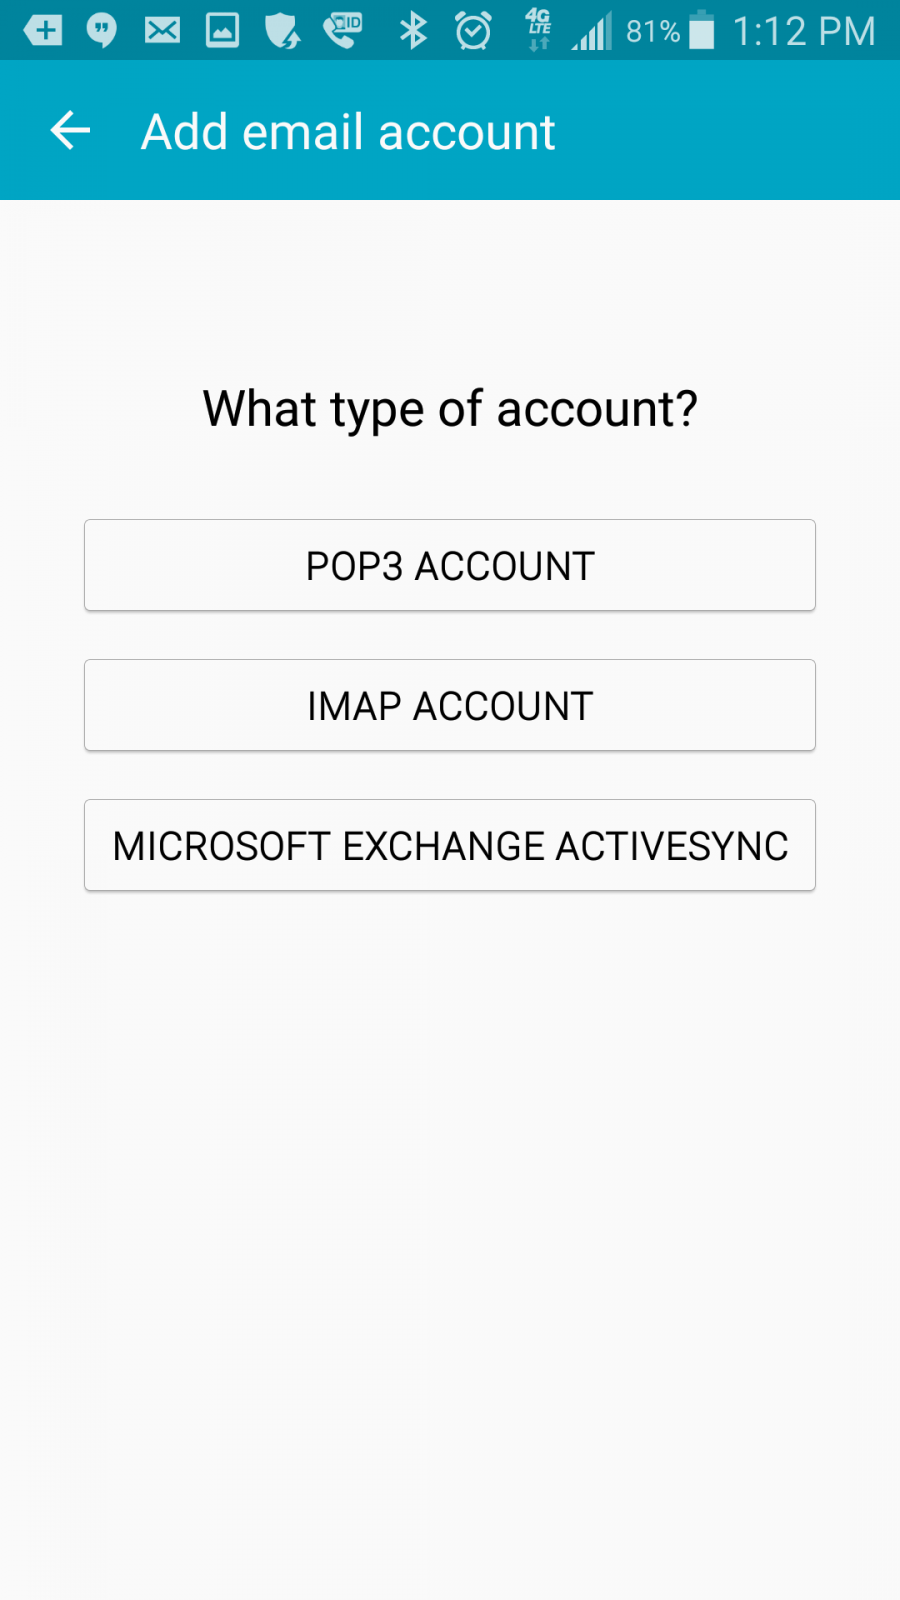
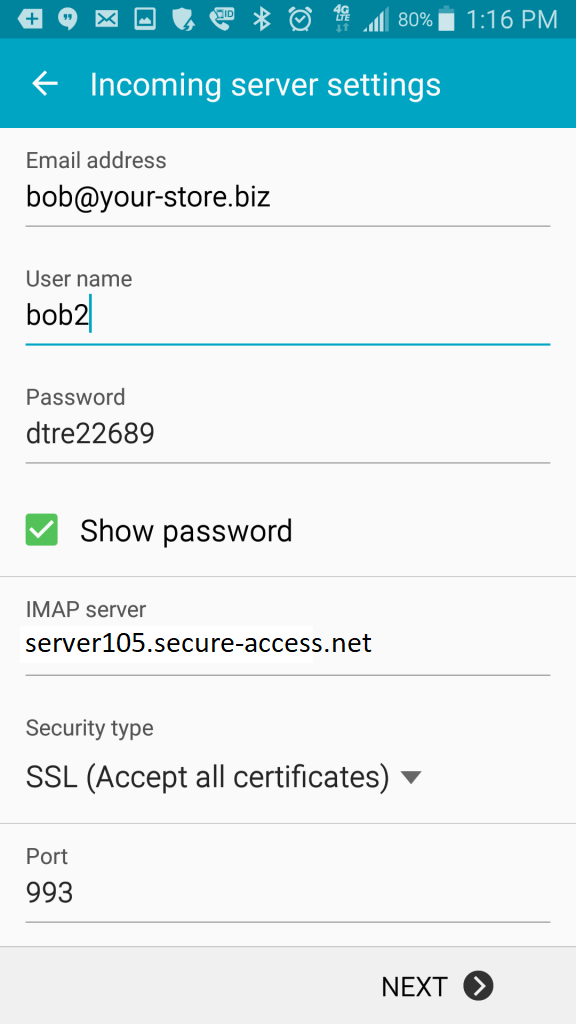
5. On the IMAP incoming mail screen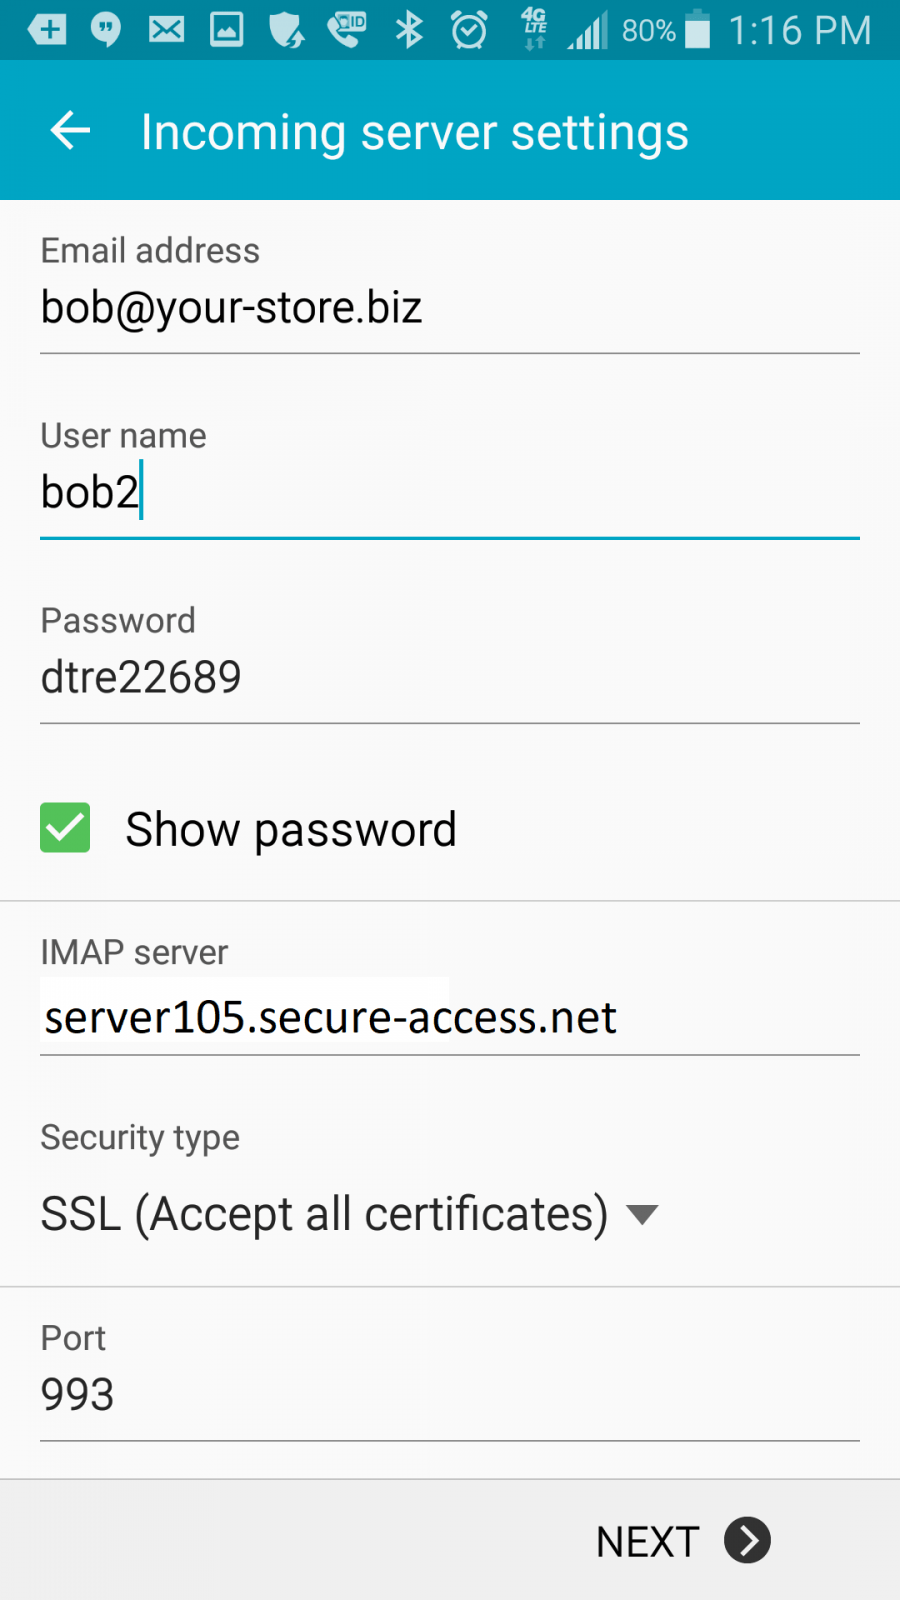
a. fill in your username and password. Note that your username is not (for example) bob@your-store.biz it is just in this case bob2 (“bob2″is the actual username showing in the siteadmin).
b. Change the incoming mail server from “imap.your-store.biz” to the server name; This will be more compatible with the security settings. In this case the server name is:
server105.secure-access.net In your browser you can see the server name by typing in [your actual domain name]/admin In this example that would be www.your.store.biz/admin
c. Set the SSL option to “SSL (Accept all certificates)”, this will normally automatically set the port to 993 which is correct.
d. Leave IMAP path prefix blank.
6. Then click Next
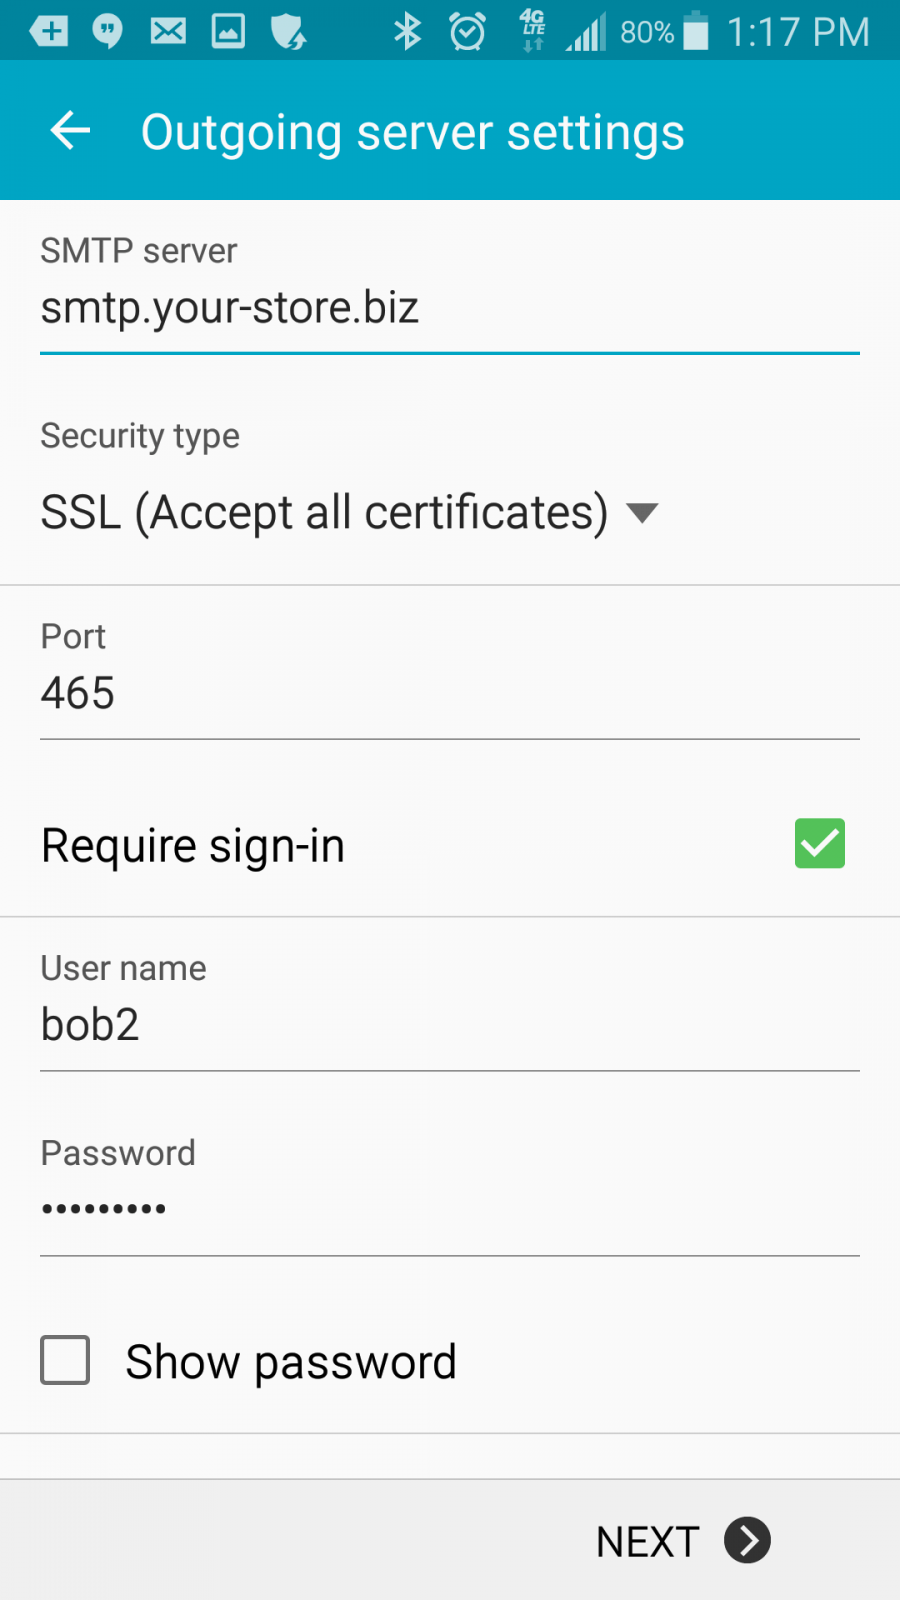
6. That will bring you to the Outgoing settings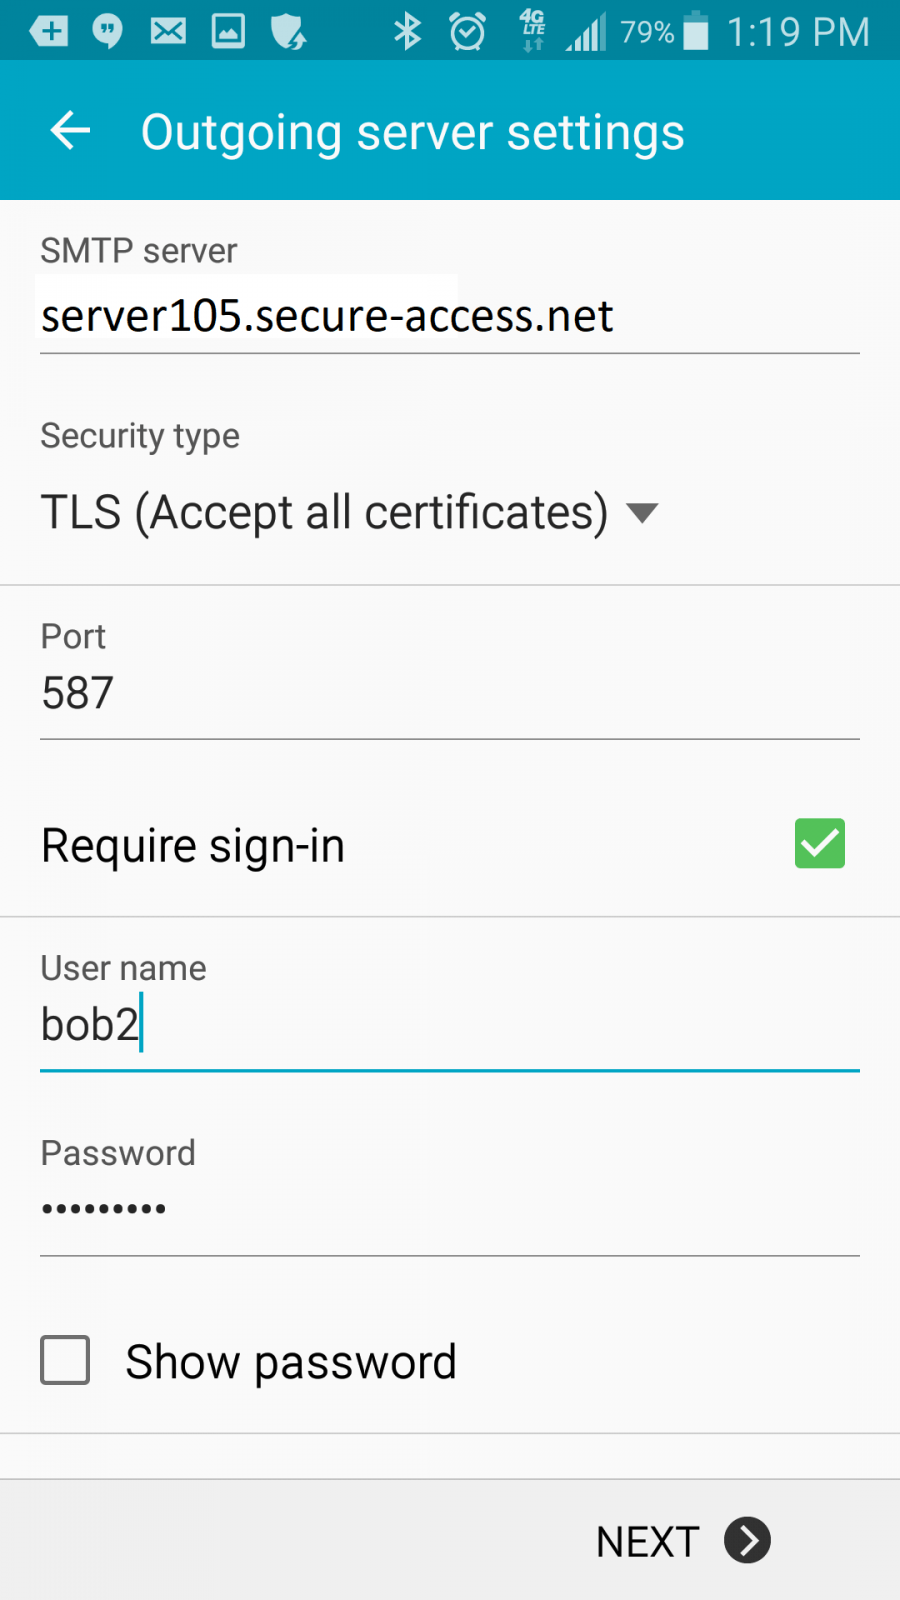
a. The default outgoing server it will probably show is smtp.your-store.biz That will work as is.
b. Security type select “TLS Accept all certificates”
c. Port: the default port of 465 may work. A better option is to set it to port: 587
d. “Require Sign-in” should be selected.
e. Check your username and password.
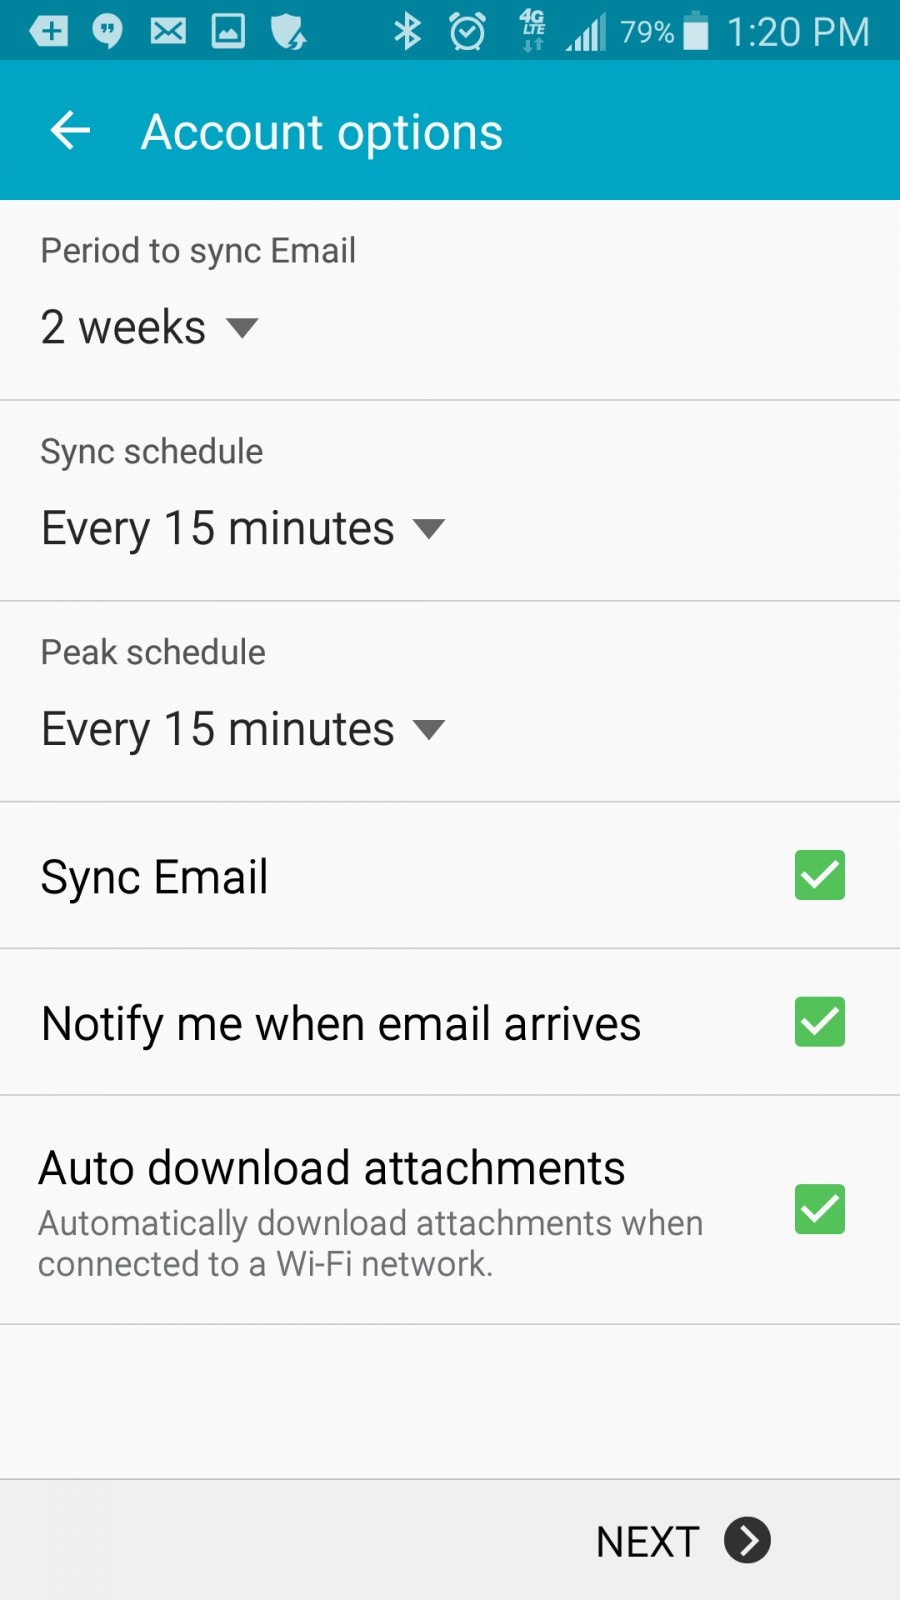
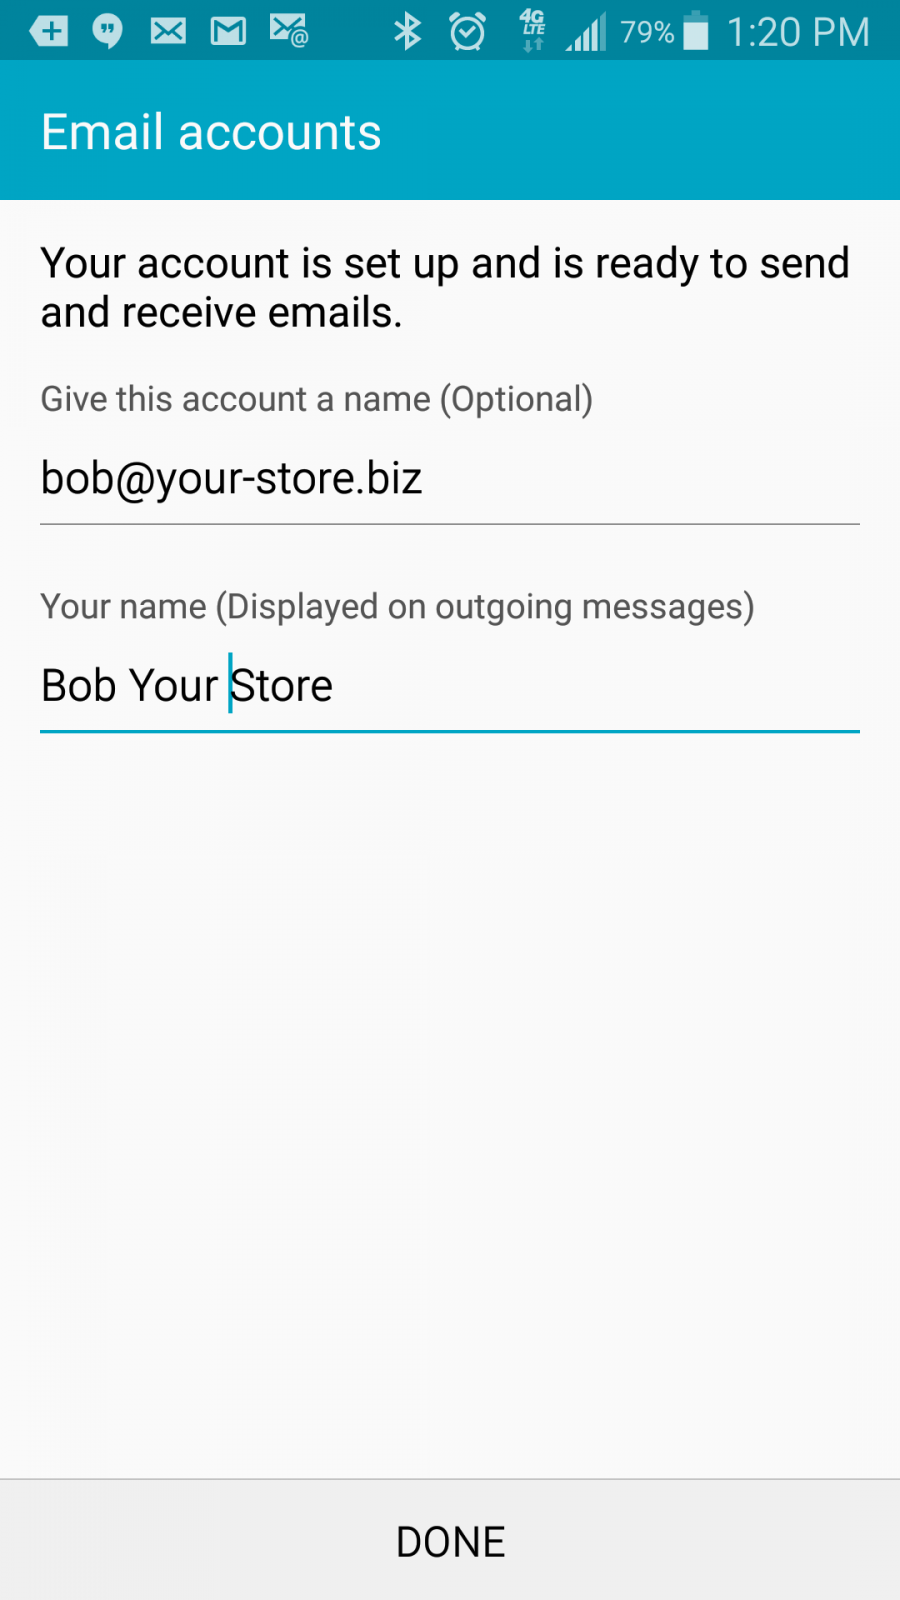
7. Sync Schedule. The defaults will generally work fine. Click Next then Done