View video example below:
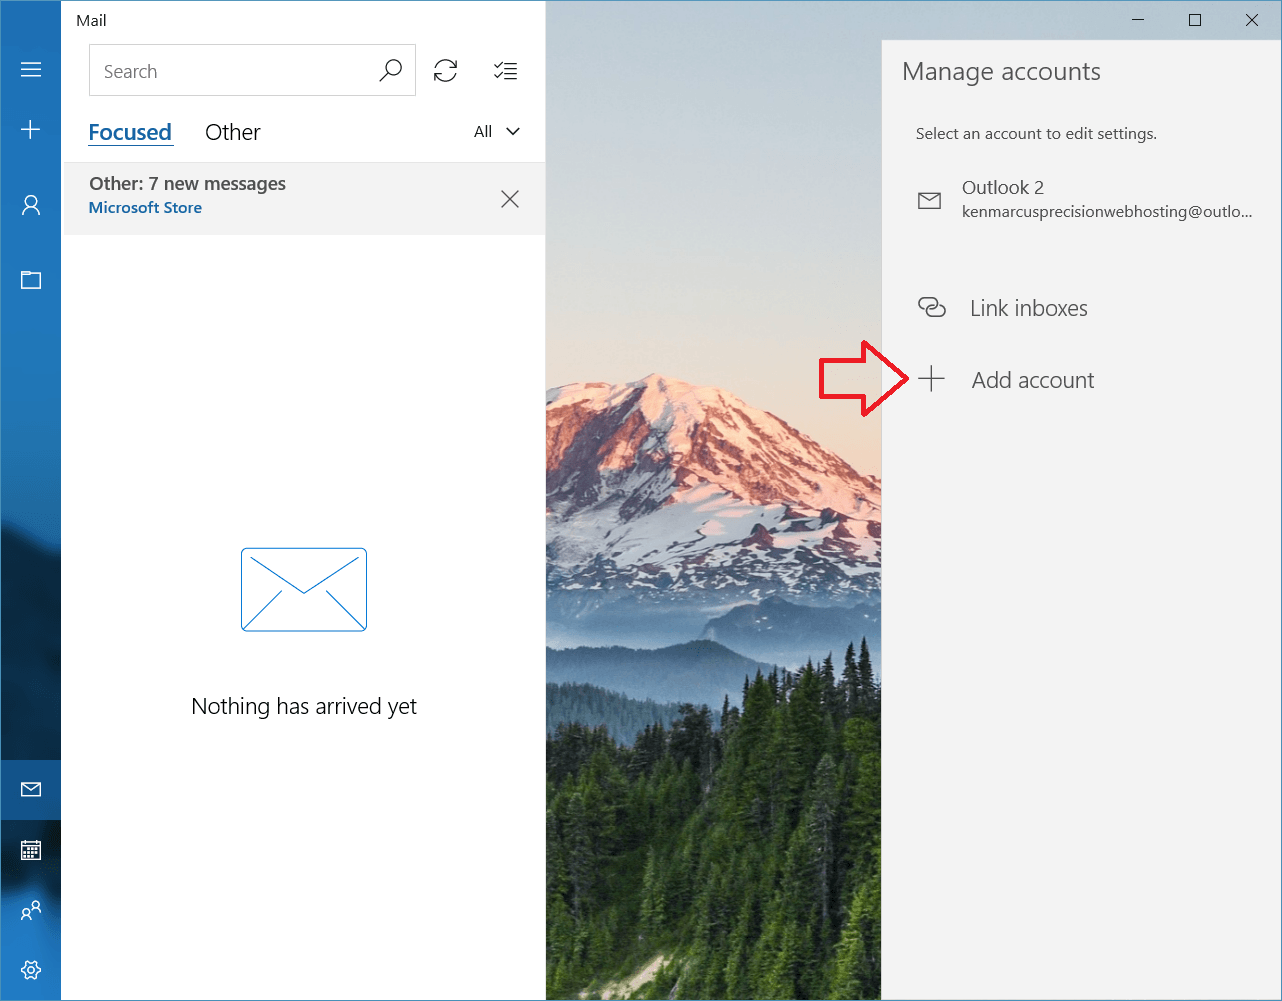
Open Windows Mail, and go to the Accounts screen, from there select Add Account
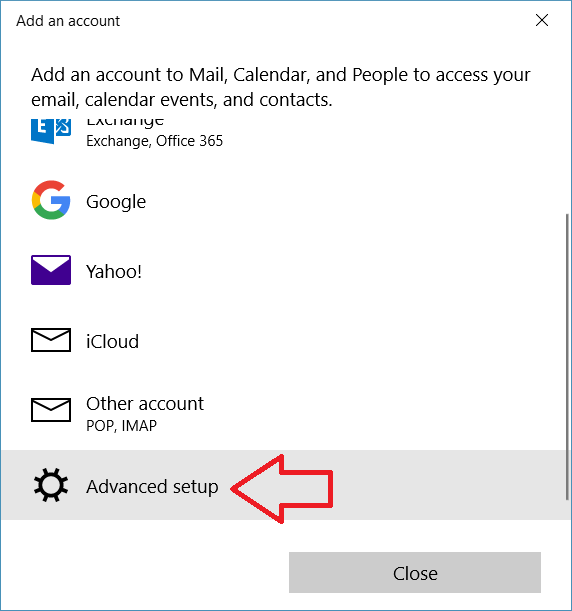
On the next screen, select Advanced set-up for the account type
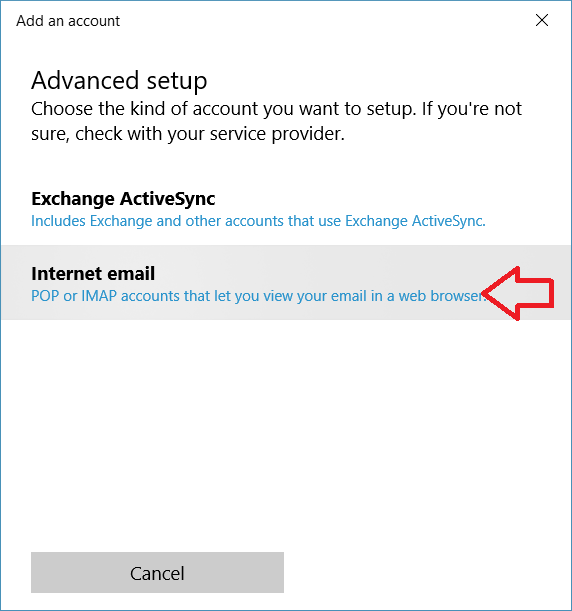
On the advanced set-up screen below, select Internet email.
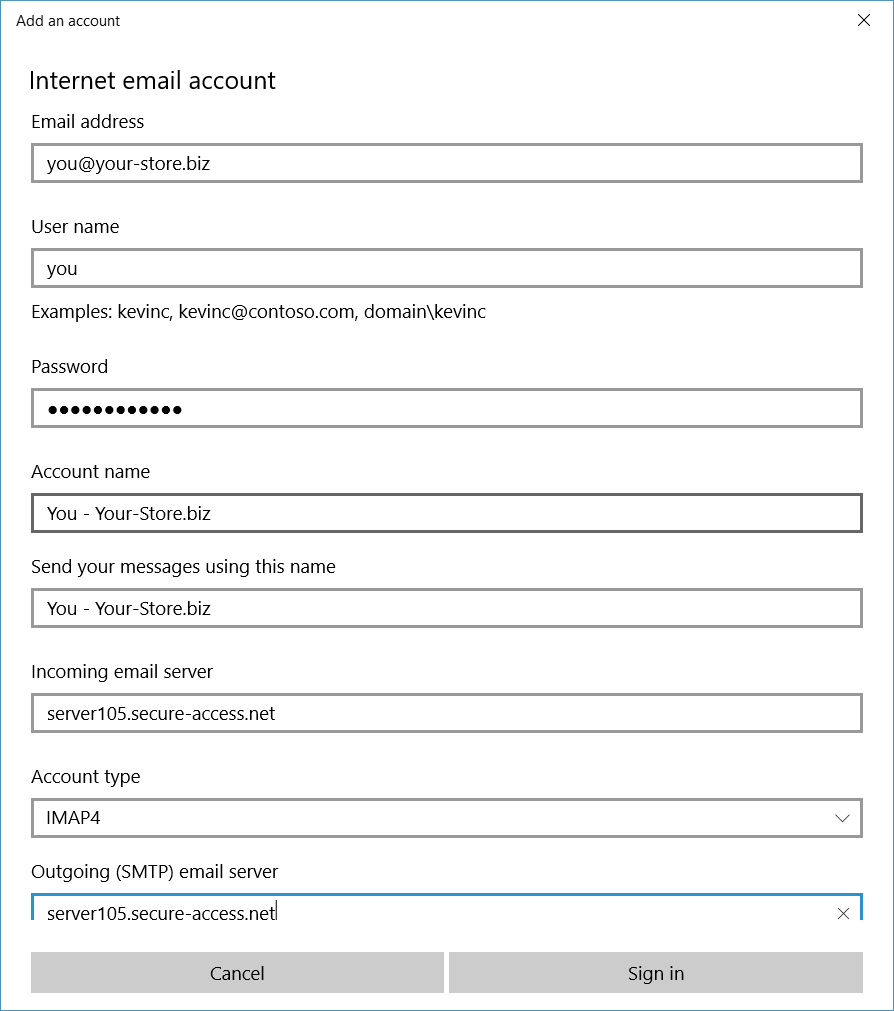
On the Add account screen below, enter in the details for your account. You will need scroll down to see all the fields.
- Email address: Your full email address, including the domain.
- Username: just the username not the complete email address.
- Password: your Windows Mail password. You can test this at the /webmail url of your site.
- Account name: How Windows Mail will refer to this account. No one else sees this.
- Send your messages using this name: This is the ‘from’ field shown for emails you will send.
- Incoming email server: set it to the server name for compatibility with the SSL certificate. You can see the server name by going to, for example, www.your-store.biz/admin
- Account type: set to
IMAP4 - Outgoing SMTP server: set it to the server name for compatibility with the SSL certificate. You can see the server name by going to, for example, www.your-store.biz/admin
- Outgoing server requires authentication: enable.
- Use the same username and password for sending email: enable
- Require SSL for incoming email: enable
- Require SSL for outgoing email: enable
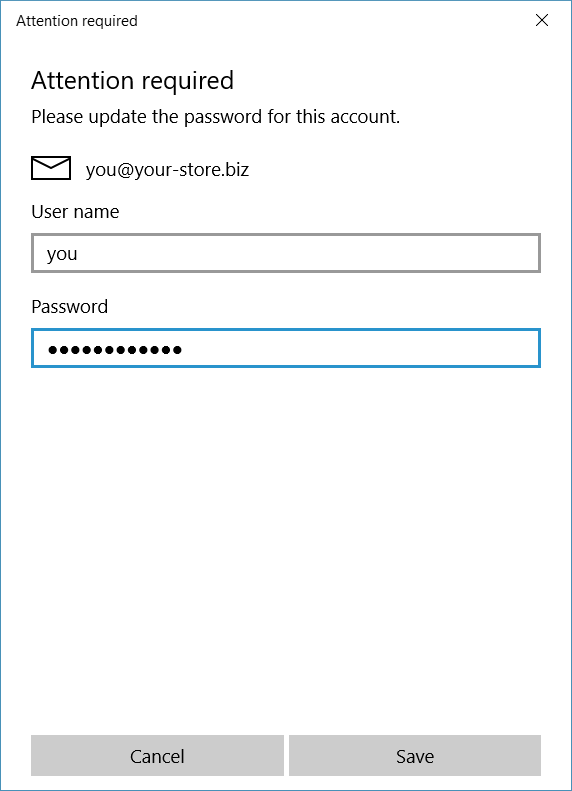
If it prompts you for the password, enter it as below

If it prompts you for the password, enter it as below.