Use Precision Web’s Shopping Cart to Sell with PayPal!

1. Sign-Up For our Powerful eCommerce Web Hosting
2. Begin Using our FREE PayPal compatible Shopping Cart
3. Use your PayPal Pro account to Accept Credit Cards Right on Your Site
Our Shopping Cart accepts PayPal Pro and/or PayPal Standard
Click here to find out about Precision Web’s Shopping Cart (a PayPal Preffered Partner Cart)
Precision PayPal Pro HELP: How do I set up my shopping cart to accept payments PayPal Pro?
1. Log into your PayPal Business account. Then select to upgrade to Paypal Pro from within your account.
2. Click the Profile Tab, then from the Profile page click the “Request API Credentials” link: see below.
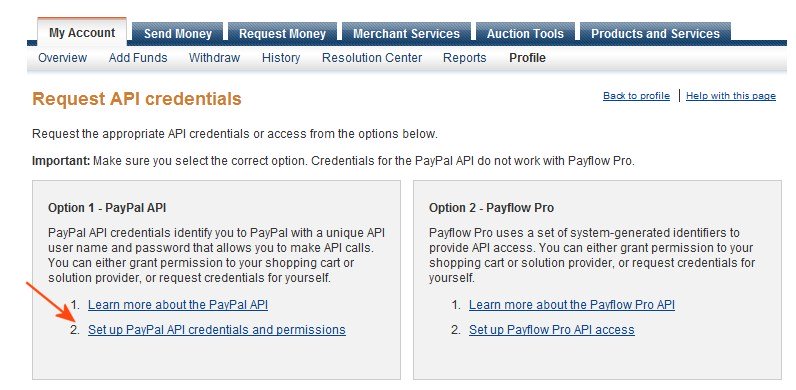
3. On the “Request API credentials” page, click the “Set up PayPal API credentials and permissions” link: see below.
4. On the “PayPal API credentials and permissions” page, select “Request API Credentials” (See below).
Note — You will not be able to Request API credentials if a “Request by signature API” has already been created. If this signature has been created, you will need to delete that signature before proceeding.

5. On the following screen, select the radion button titled “
6. The next page will show you your and “API Password”
– Select and copy the “API Username” then paste this into the “API Username” field on the shop/owner Checkout Type page.
-Now select and copy the “API Password” then paste this into the API Password field on the shop/owner Checkout Type page.
– On the shop/owner Checkout Type page, in the “Email Address” field type in your the email used for logging in to the paypal.com
Back at the paypal.com site, click the Download button. It will prompt you to download the certificate (see below).
7. Once you have downloaded the API Certificate to your computer, then from the shop/owner control panel, use the Browse/Select File button to the right of the “Add Paypal Payment Pro API Certificate” field to select it from your computer’s hard drive.
8. Now further down the Checkout Type page click the “Save All Changes” button to save these values.
9. After completing this step switch back to the Paypal.com site and click the “Back To Profile Summary” link at the upper right of the page. And again click on the Request API Credentials link (See below).
10. Then click the Set up PayPal API credentials and permissions link again (see below).
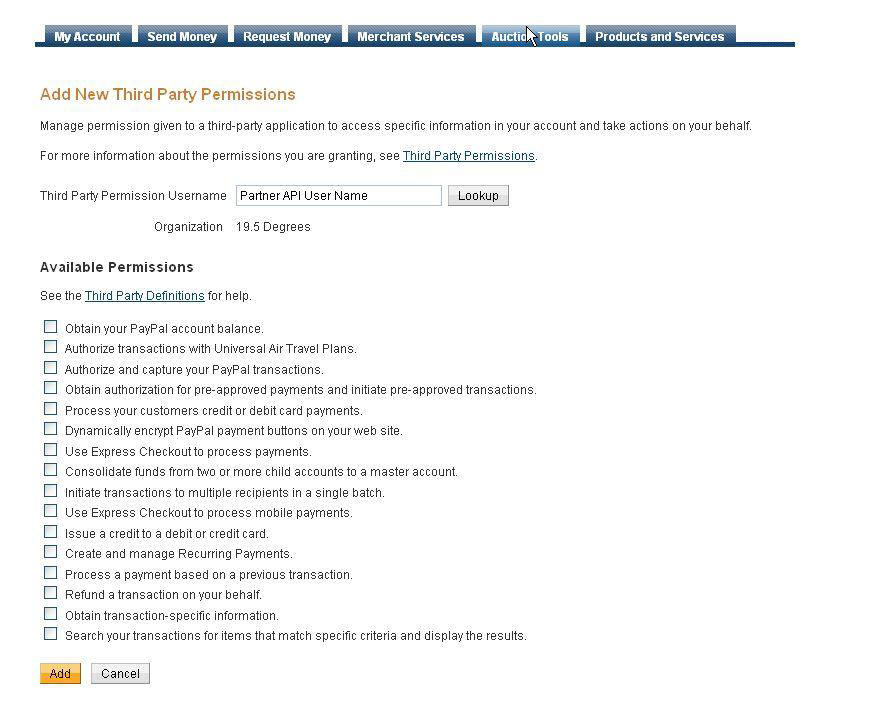
11. From that page then click “Add or edit API Permissions” (see below).
12. Grant Third Part API by typing the API username in the �Third Party Permission Username� field and then selecting the group for which you would like to give the permission for. The details and the API names for each group can be obtained by clicking the Third Party Definitions link in the page below.
13. After checking the group/s and by clicking the Add button, you are granting permission to a Third Party. After this action is done, you will see the page below.

14. At this point you can do three things:
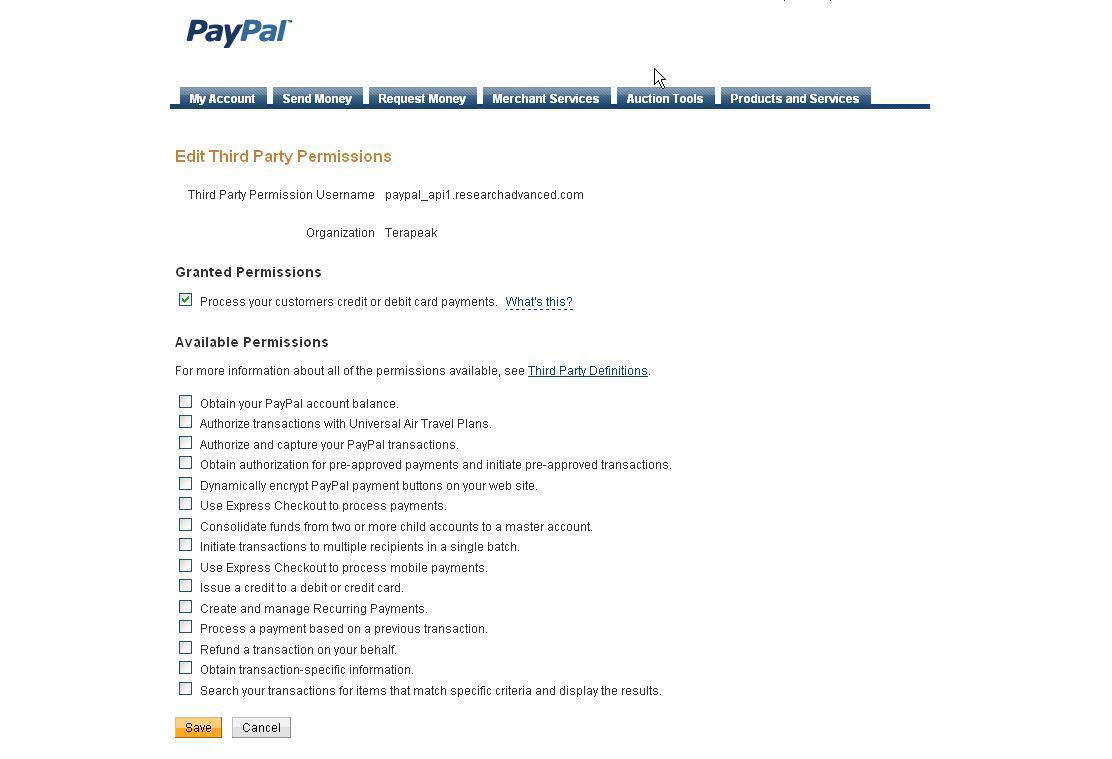
- Edit Third Party Permissions � If you want to add more permissions, click Edit Third Party and you will see the screen below
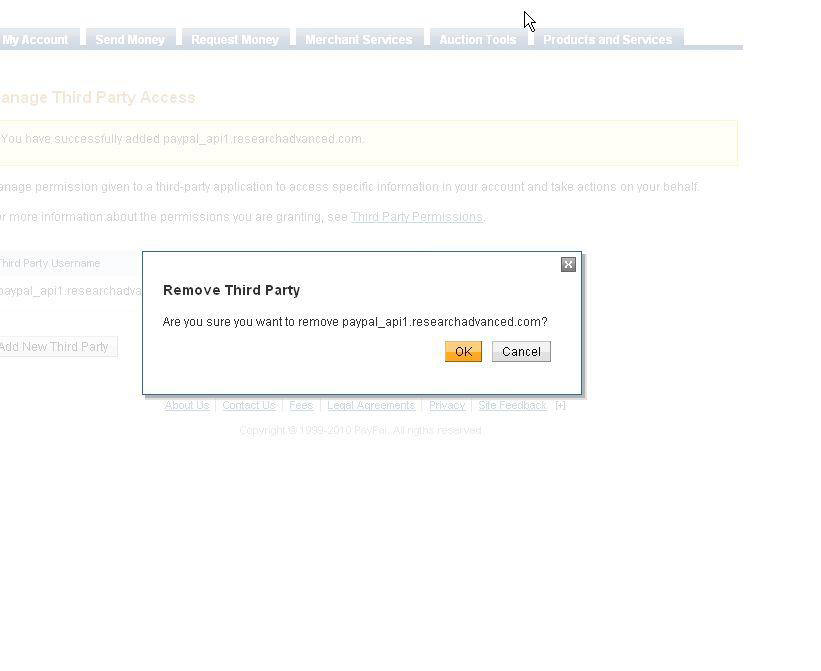
- Remove Third Party Permissions � In the Manage Third Party page in Step4. Click on the drop down button next to Edit Third Party and click on Remove Third Party. Then you will see the screen below
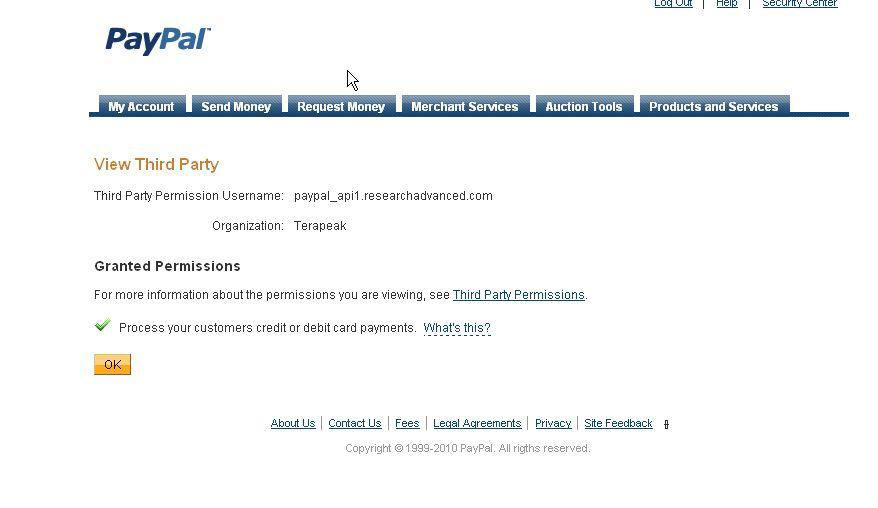
- View Third Party Permissions – In the Manage Third Party page in Step4. Click on the drop down button next to Edit Third Party and click on View Third Party. Then you will see the screen below
–>