Blog

Author Archive

Category Selection for Items

Category Selection

Navigation:
Inventory Control > Edit Item > Category Selection
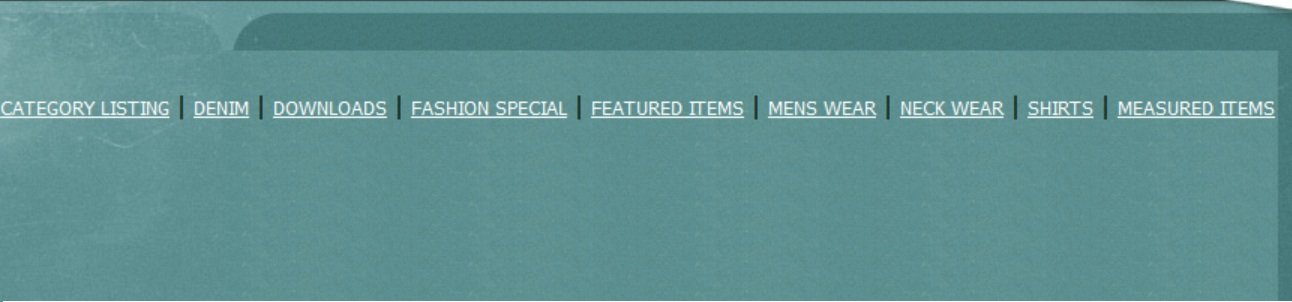
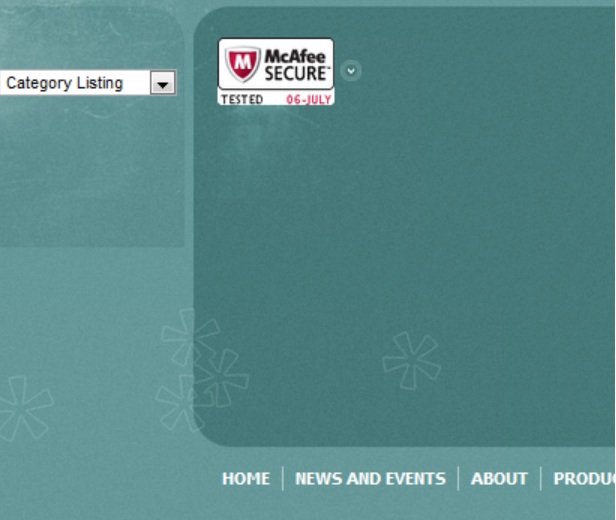
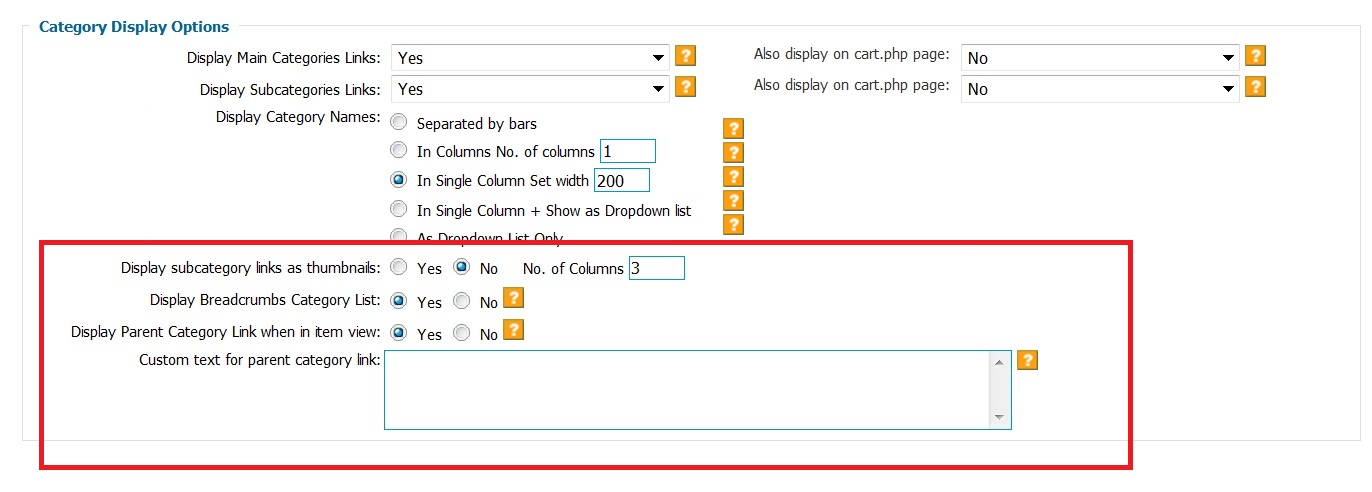
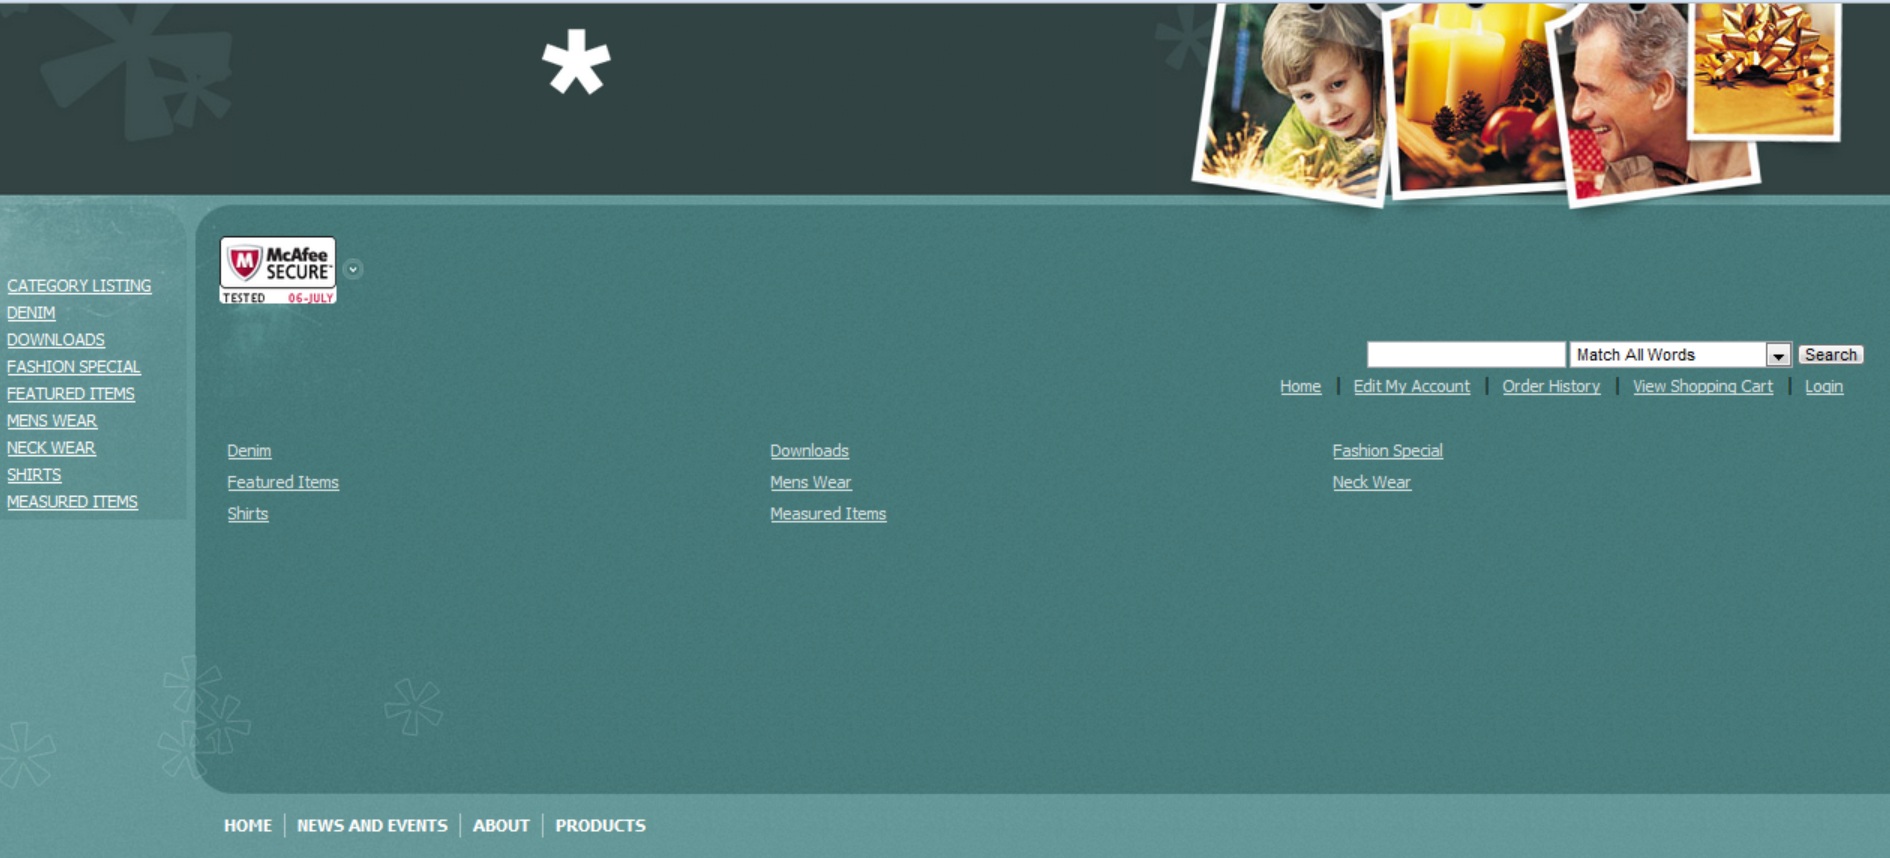
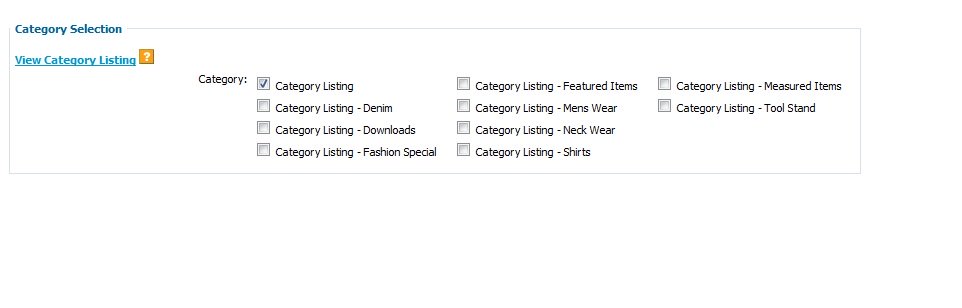


Category
Selection 

You are able to categorize your items by expanding the ‘View Category Listing
Link’ To create categories, navigate to: Manage > Categories > Add Category

Once you have expanded the category listing, select the category(ies) you would
like to associate with your item.  

Categories are helpful for the customer to locate your item. 

Posted in: setupinv

Leave a Comment (0) →

Shopping Cart Newsletter Contents

Customer Newsletter
"Contents"

The Contents tab is
where you are able to create and send the Newsletter. 

Navigation:
Promotion > Customer Newsletter > Contents Tab


Contents
The easiest way to create your newsletter is to copy & paste from your
website or word editor to Newsletter Contents field below. You also can create
the newsletter from scratch below, but we recommend copying & pasting from your
website. 

The Newsletter Contents pane allows you to create your newsletter using a
word editor. Some of its functions include modification of text, insertion of
tables, and insertion of images. The steps to insert an image into your
newsletter are:
In your browser, browse to a page on your website that shows the image you want.
1.  Right click on the Image and select "Properties".
2.  Select the image
url text from the popup by selecting it with your mouse. Then copy that selected
url with <Control> C.
3.  On the newsletter page click the image insert icon.
4.  Click in the image url field, then paste the copied URL using <Control> V.
5.  Click the insert button on the popup.

Options
From Name
The person or company the newsletter is
from. Customers will often see this next to the subject line of their email.


From Email

Customers will see this as the email address the newsletter
is from.


Subject

The subject of the newsletter. Customers will see this as the
subject line in the email they receive.

Send Newsletter
This sends the newsletter to the
customers selected under the "Lists" tab.

Posted in: newsletter

Leave a Comment (0) →

Shop Details

Shop Details Section
These are the company details seen in
your shop.


Manage > General Settings


(click here for larger image)

Contact Information

This section of your settings configures the contact information for your shop. 
You can choose to have this displayed at the bottom of the shop, and you can
also select a logo if so desired.

The "Shop Name" value is used in the subject line of the order confirmation
emails that are sent to your customers. It is also displayed on the Offline
Order form (the order form that shoppers would use if they want to mail or fax
in an order) if you have the offline order form enabled. It also shows up on the
shop/owner login page.

The address, phone, & fax values are displayed at the bottom of your shop pages.
However, if you have anything in the Custom Footer field, then only the Custom
Footer field HTML will be displayed; the text in address, phone & faxe
fields are ignored in that case. These values are also displayed on the offline
order form.


(click here for larger image)

Email

The Administration Email address does not appear in your shop. This email is the
address where order confirmations are sent when someone purchases something from
your shop. It will also receive notifications concerning stock quantities if you
choose to have the shop monitor such things.


(click here for larger image)

Currency

The Currency Selection is simply the sign the shop will put before a price. Most
people will leave this as $.

Posted in: general_settings

Leave a Comment (0) →

Category Display Options


Category Display Options

This section of the general settings allows you
to modify your categories’ look.

Shop Control Panel


(click here for larger image)


Category Links

The shopping cart software allows you to choose whether to display categories in
the shop and/or the cart page of the shop.

You also have the ability to choose just to show the Main Categories or the
Subcategories as well.


(click here for larger image)
 

Category Display Names


Separated by bars

Select to display categories separated by ‘|’


In Columns
 No.
of columns
 

Select and specify total number of columns in each row to
display categories in columns 


In Single Column
 Set
width
 

Select and specify column width to display categories in a single column


In Single Column + Show as Dropdown list

Select to display categories in as a dropdown list and also as a single
column


As Dropdown List Only

Select to display categories in as a dropdown list
only


(click here for larger image)

Other Category Display Options


Display subcategory links as thumbnails

This option allows you to see you subcategory links
on the main category page.  This is a nice option to have links displayed
not only on the left hand side, but also on the main part of the page where it
is more visible.  These links will appear after any custom html (optional)
entered for the category.  You also have the option to enhance these links
by create images for these subcategory links.  Navigate to:

Inventory > Manage Categories > Add Category (or Edit Category HTML) > Category
Image


Display Breadcrumbs Category List

This shows the customer the category tree of a
particular item allowing for easy navigation. If you click on an item, above the
item title you would see "Parent Category>Subcategory".


Display Parent Category Link when in item view

Displays a link to the Parent Category on the actual item
page.


Posted in: general_settings

Leave a Comment (0) →

Format Tab

  Format Tab
The Format Tab alllows you to select the format you would like to send your newsletter in. The ‘Text’ tab will send the newsletter in plain text format only, while ‘HTML’ format allows for additional formatting. ‘Text and HTML’ sends it as an HTML to customers whose email accept HTML formatting, and as in text format to customers whose email do not accept HTML formatting.dd

Transfer Protocol Transfer Protocol
It is the way that the server sends the newsletter to your customers. The ‘Send Mail’ feature is the standard way to send the newsletter and no user name/password is required. Sending the newsletter using SMTP authentication is a better way of sending as it has a better delivery rate. This means that fewer recipients will see this message as spam, and will allow you to see any email bounces at the email you provide. To use the SMTP Authentication method you would need to have access to your website’s email account. Use an email account associated with your website, and enter the user name and password for that email in the boxes provided. This is the same information as using the Web Mail. You’ll also want to use this email under the "Contents" section.

SMTP Authentication

The username would be your user name for the email account that you are sending the email from. This is the same information used to log into your webmail.

The password would be the password for the email account that you are sending the email from. This is the same information used to log into your webmail.

Posted in: newsletter

Leave a Comment (0) →

Update Button

Update Item Data


Also update URL List 
Check this box, then click ‘Update
Item Data’. It will update the changes made on this item page to the URL
list of items (found at Import/Exports > Export Item URL list). The URL is
the list of item URLs (links). 

Most of the time you would check this
box is if you changed the name for this particular item, and you want the
item URL list to reflect the new name. URLs automatically change the link to
reflect the new name, so the URL list needs to be updated if you change the
name. For example, if you change the name of your item title from Fishing
Pole to Bob’s Fantastic Fishing Pole, the url would change from
www.yoursite.com/item/Fishing-Pole-10 
www.yoursite.com/item/Bob’s-Fantastic-Fishing-Pole-10 

The URL list is used by the Sitemap page, which is designed to help with
search engine crawling bots.

Google Product Search 
Check this box, then click ‘Update
Item Data’. It will update the changes made on this item page to the Google
Product Search page (found at Promotion > Export Google Product Search) 

This checkbox is designed for when you update one item at a time. If you
currently have a Google Product Feed and are updating this item only, this
is a good box to check. If you are creating a Google Product Feed or
updating a lot of items, please navigate to the Promotion > ‘Export Google
Product Search’ page. At that page you will be able to load/update all items
at once for the Google Shopping feed.

Sitemap page 
Check this box, then click ‘Update Item Data’.
It will update the changes made on this item page to the Sitemap.xml file. 

This option is for the Sitemap.xml file only. You are also able to load an
HTML Sitemap (found at Promotion > Sitemap), which is also helpful for
search engines. This HTML Sitemap is not affected by this checkbox. 

The purpose of the sitemap.xml file is to help search engine crawling bots
find all your shopping cart item pages. Contact us, your shopping cart
hosting provider, to get a sitemap.xml file set up.

Posted in: setupinv

Leave a Comment (0) →

Shopping Cart Newsletter Lists

Customer Newsletter 
Lists

Navigation:
Promotion > Customer Newsletter > Lists


The
Lists tab allows you to select who will receive the newsletter. You may send the
newsletter to email addresses you choose (only customers), to the shop
administrator, or to the complete list of customers who had signed up for your
newsletter. This list is viewable under the ‘View Subscribers’ tab.

Posted in: newsletter

Leave a Comment (0) →

Administrative Email & Currency Selection & Default Country Selection

The Administration Email address does not appear in your shop. This email is the address where order confirmations are sent when someone purchases something from your shop. It will also receive notifications concerning stock quantities if you choose to have the shop monitor such things (explained further down the page).

The Currency Selection is simply the sign the shop will put before a price. Most people will leave this as $.

The Default Country Selection dictates which country is preselected on the checkout drop down for your customers. If your shop is based in the United States but the majority of your sales are to the United Kingdom, you may choose to select ‘United Kingdom’.

Posted in: general_settings

Leave a Comment (0) →
Page 8 of 21 «...678910...»