Make Shopping Cart Look Like Design
Posted in: videos
Leave a Comment (0) →Author Archive
Posted in: Stamps
Leave a Comment (0) →|
Link & Button Display Options This section of the general settings allows you to modify how your links & buttons display. Manage > General |
|
| Shop Control Panel | |
|
|
|
|
|
|
|
|
|
|
|
|
Posted in: general_settings
Leave a Comment (0) →
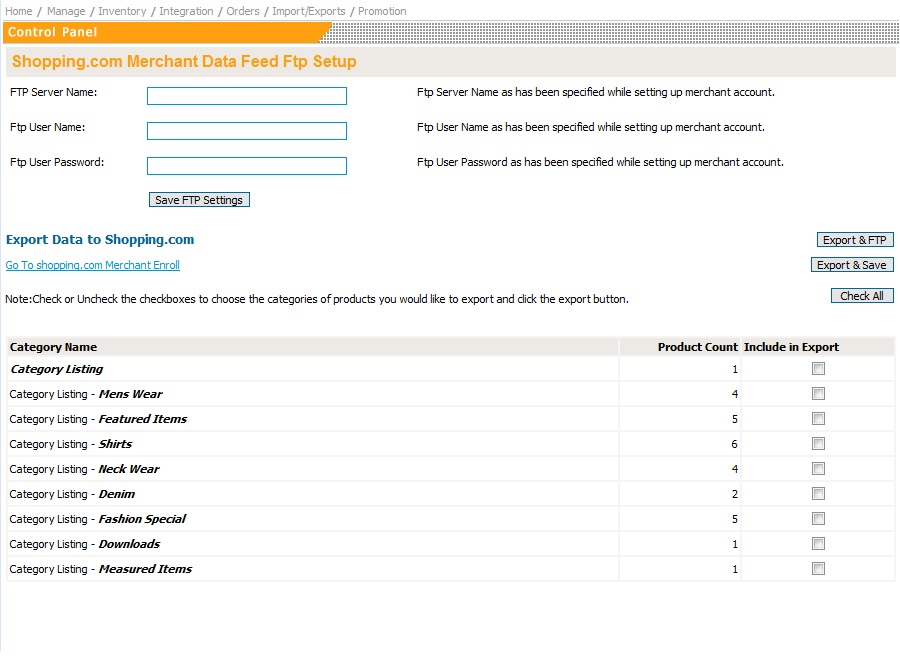 Shopping.com Shopping.comMerchant Data Feed Ftp Setup There are two ways to link to you shopping.com account.
|
Posted in: export
Leave a Comment (0) →
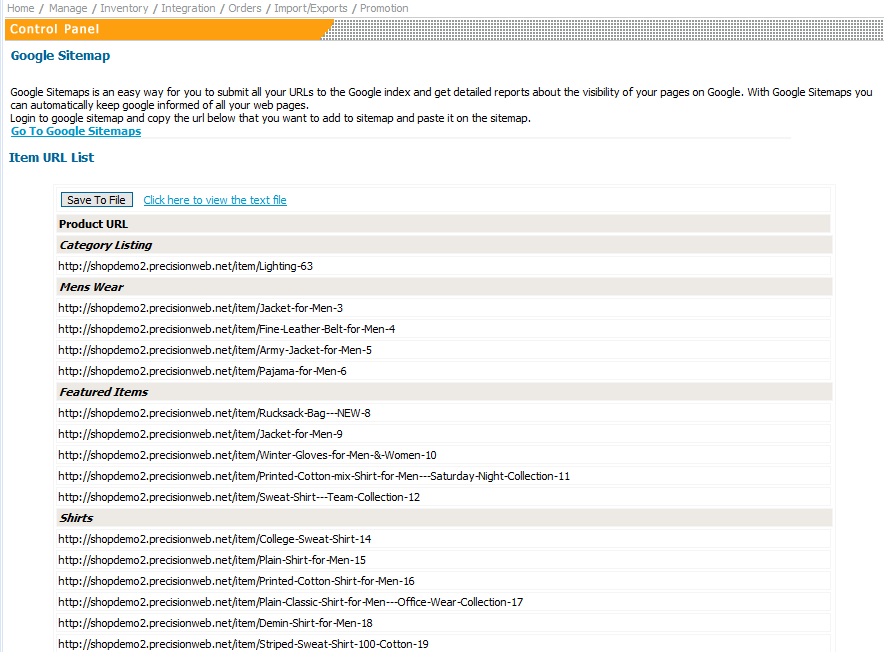 What’s What’sa good use of the URL list? One good use of the URL list is Google Sitemaps. You can download this list to a .txt format and use it for Google Sitemaps is an easy way for you to submit |
Posted in: export
Leave a Comment (0) →
| Shop Template This section of the general settings allows you to integrate your web design with the shopping cat software.Manage > General Settings > Click here to import / edit shop template (used on item pages and cart page) |
|
|
|
|
Posted in: general_settings
Leave a Comment (0) →| Automated Orders Navigation: Orders > Automated Order Transmission |
Test – Automated Order Transmission The automated order transmission allows you to post orders to an outside source. |
Posted in: shopmanual
Leave a Comment (0) →|
This section allows you to remove categories.
Navigation: |
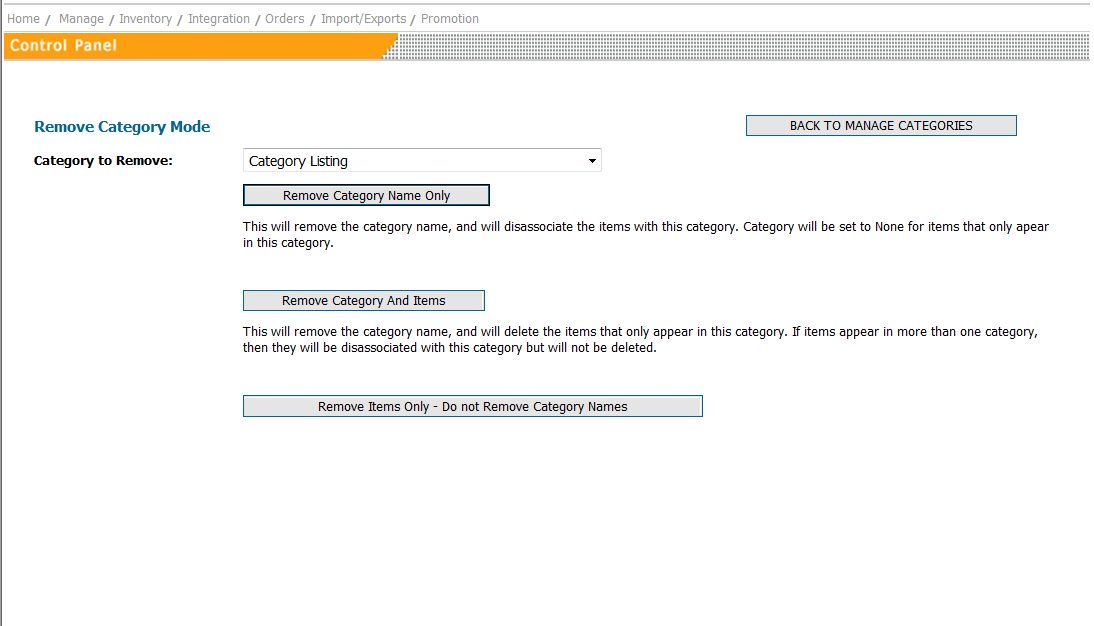 Remove RemoveCategory Remove Category Name Only This will remove the category name, and will disassociate the items with this category. Category will be set to None for items that only apear in this category. Remove Category Name and Items This will remove the category name, and will delete the items that only appear in this category. If items appear in more than one category, then they will be disassociated with this category but will not be deleted. Remove Items Only – Do not Remove Category Names This option allows you to delete all the items in a particular category without deleting the category itself. |
Posted in: category
Leave a Comment (0) →
