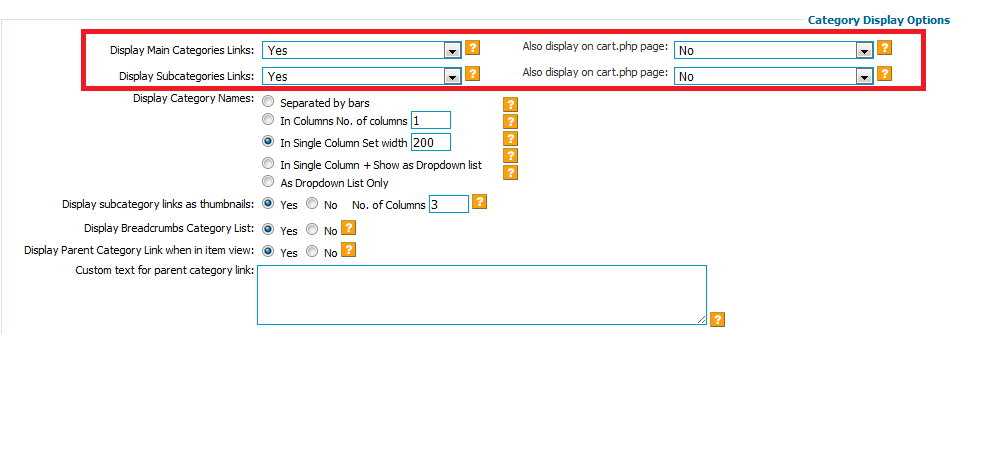
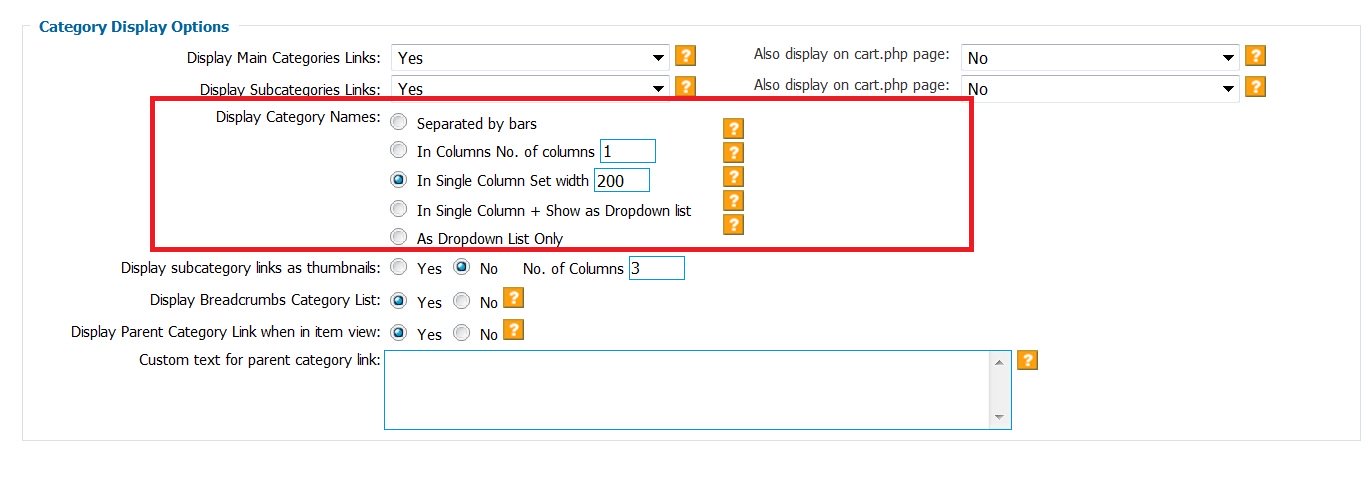
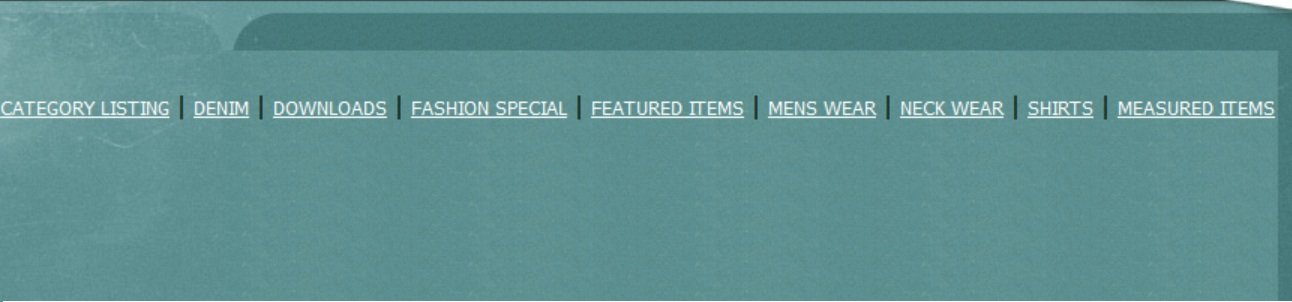
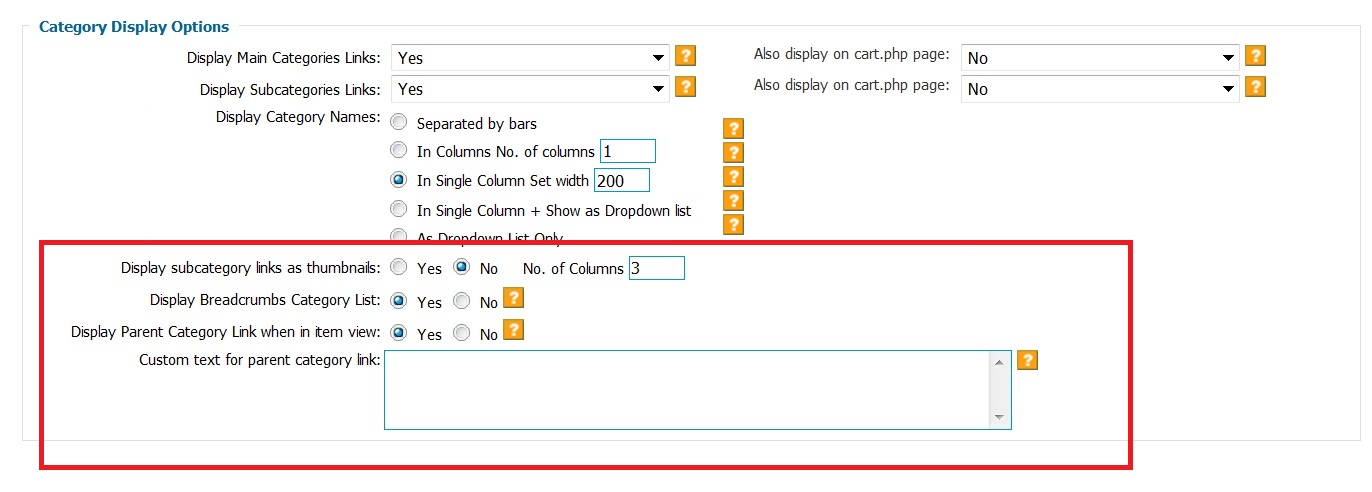
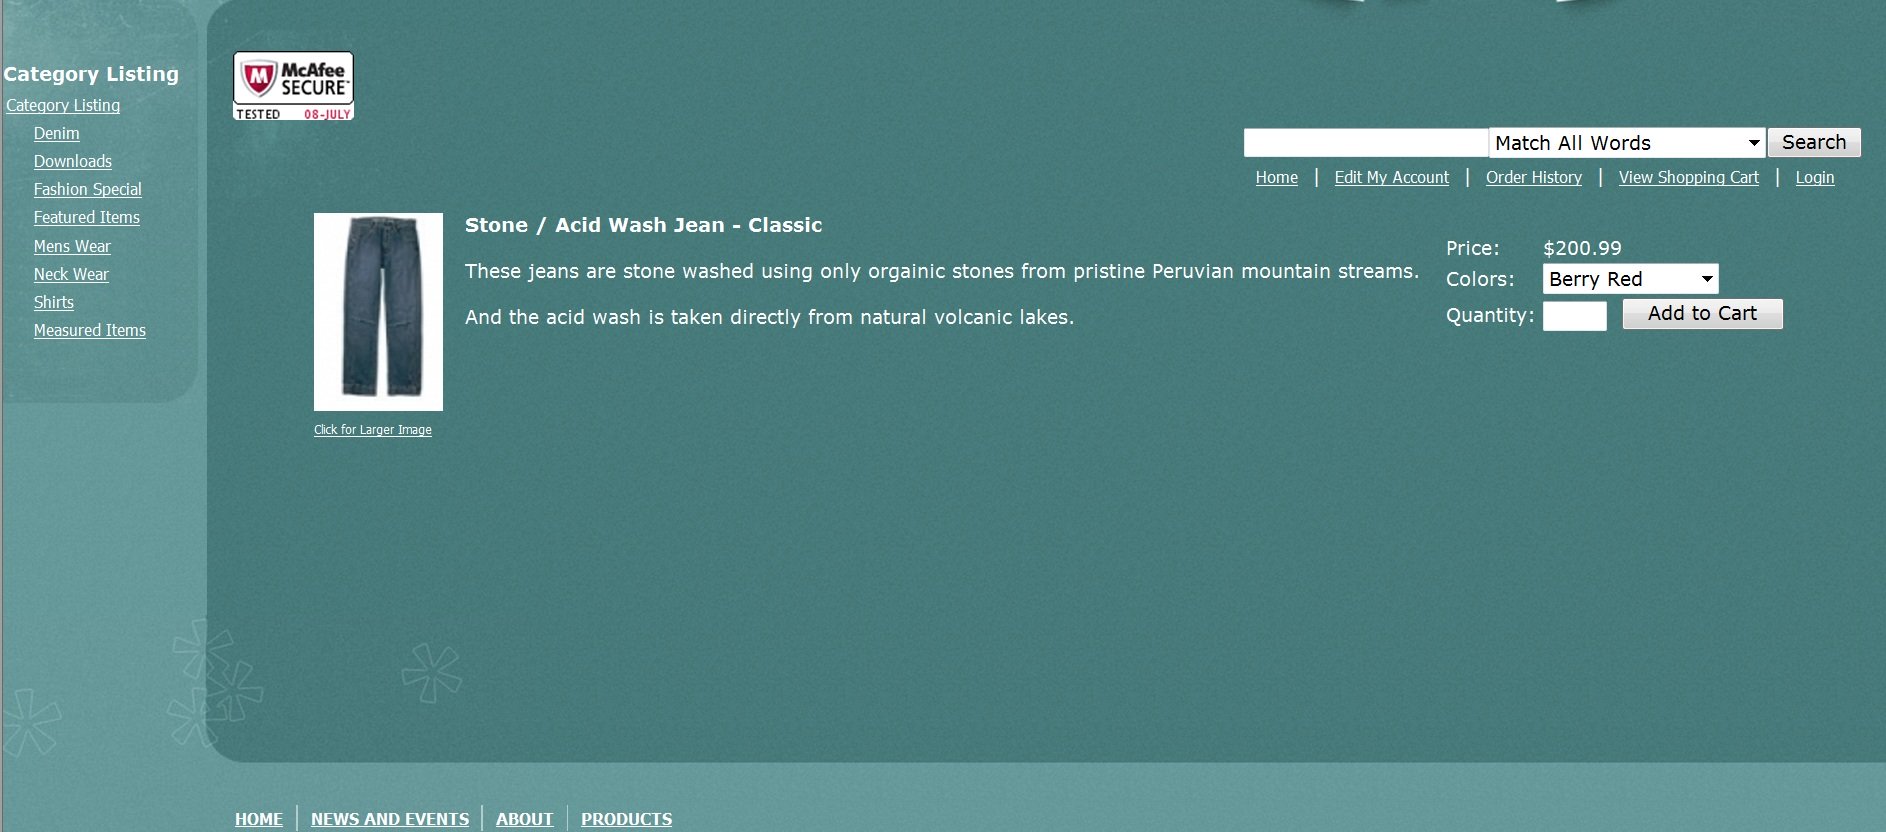
Category Display Options
|
Category Display Options This section of the general settings allows you |
||
| Shop Control Panel | ||
|
||
|
||
|
||


Posted in: general_settings
Leave a Comment (0) →Archive for general_settings
|
Category Display Options This section of the general settings allows you |
||
| Shop Control Panel | ||
|
||
|
||
|
||
Posted in: general_settings
Leave a Comment (0) →The Administration Email address does not appear in your shop. This email is the address where order confirmations are sent when someone purchases something from your shop. It will also receive notifications concerning stock quantities if you choose to have the shop monitor such things (explained further down the page).
The Currency Selection is simply the sign the shop will put before a price. Most people will leave this as $.
The Default Country Selection dictates which country is preselected on the checkout drop down for your customers. If your shop is based in the United States but the majority of your sales are to the United Kingdom, you may choose to select ‘United Kingdom’.
Posted in: general_settings
Leave a Comment (0) →|
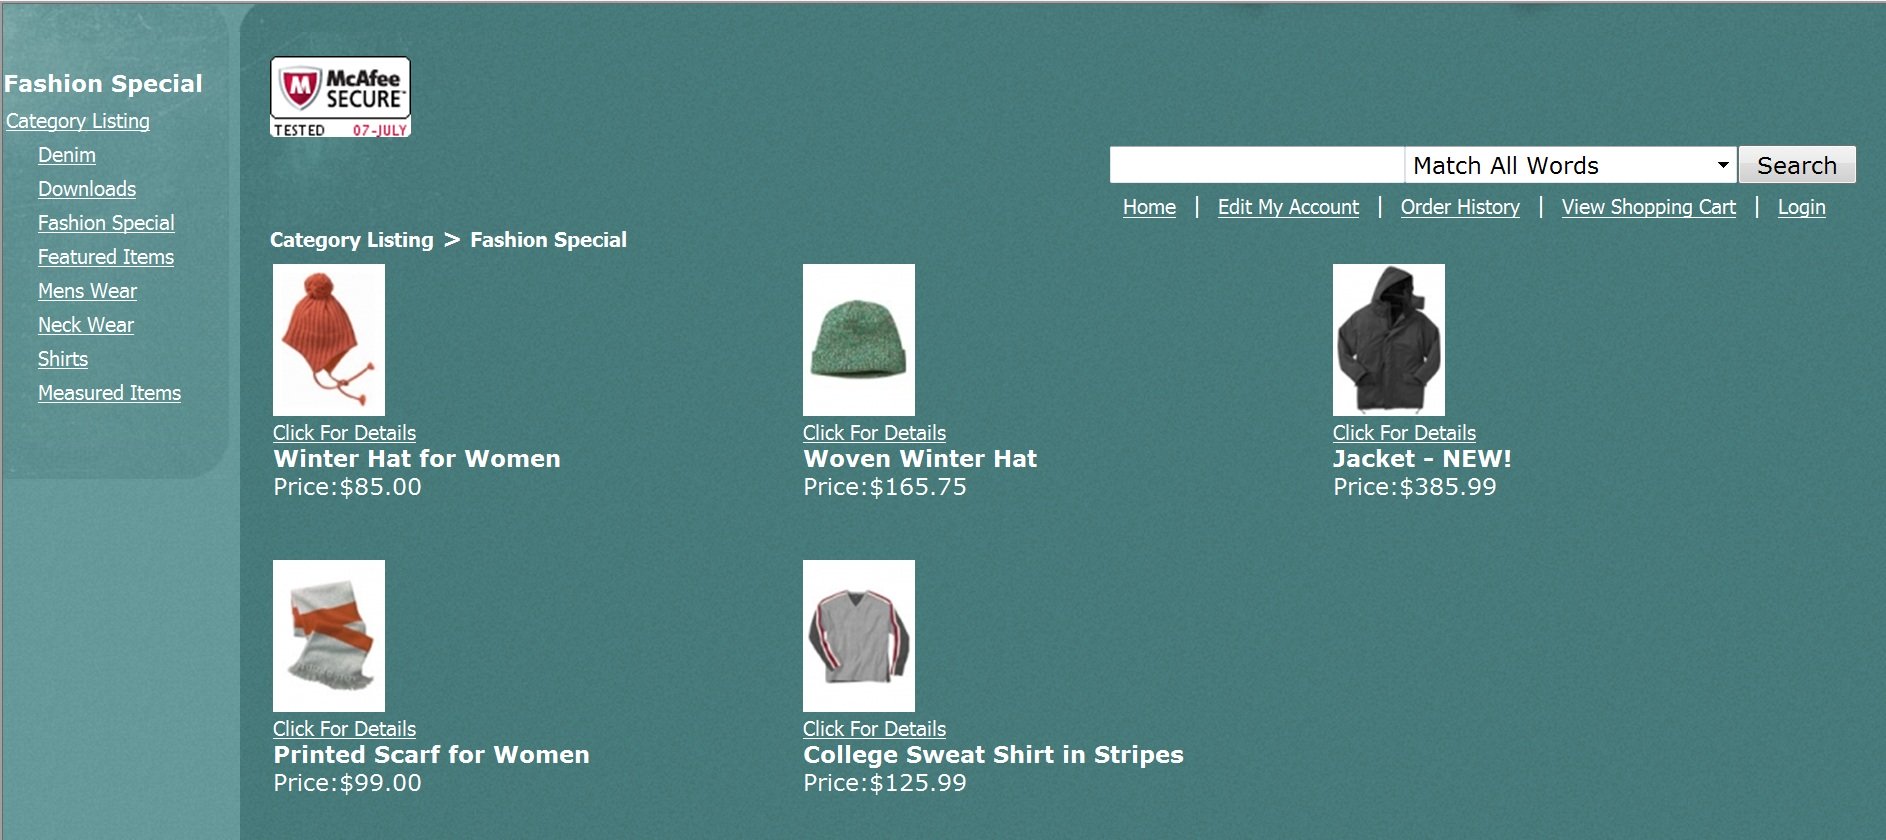
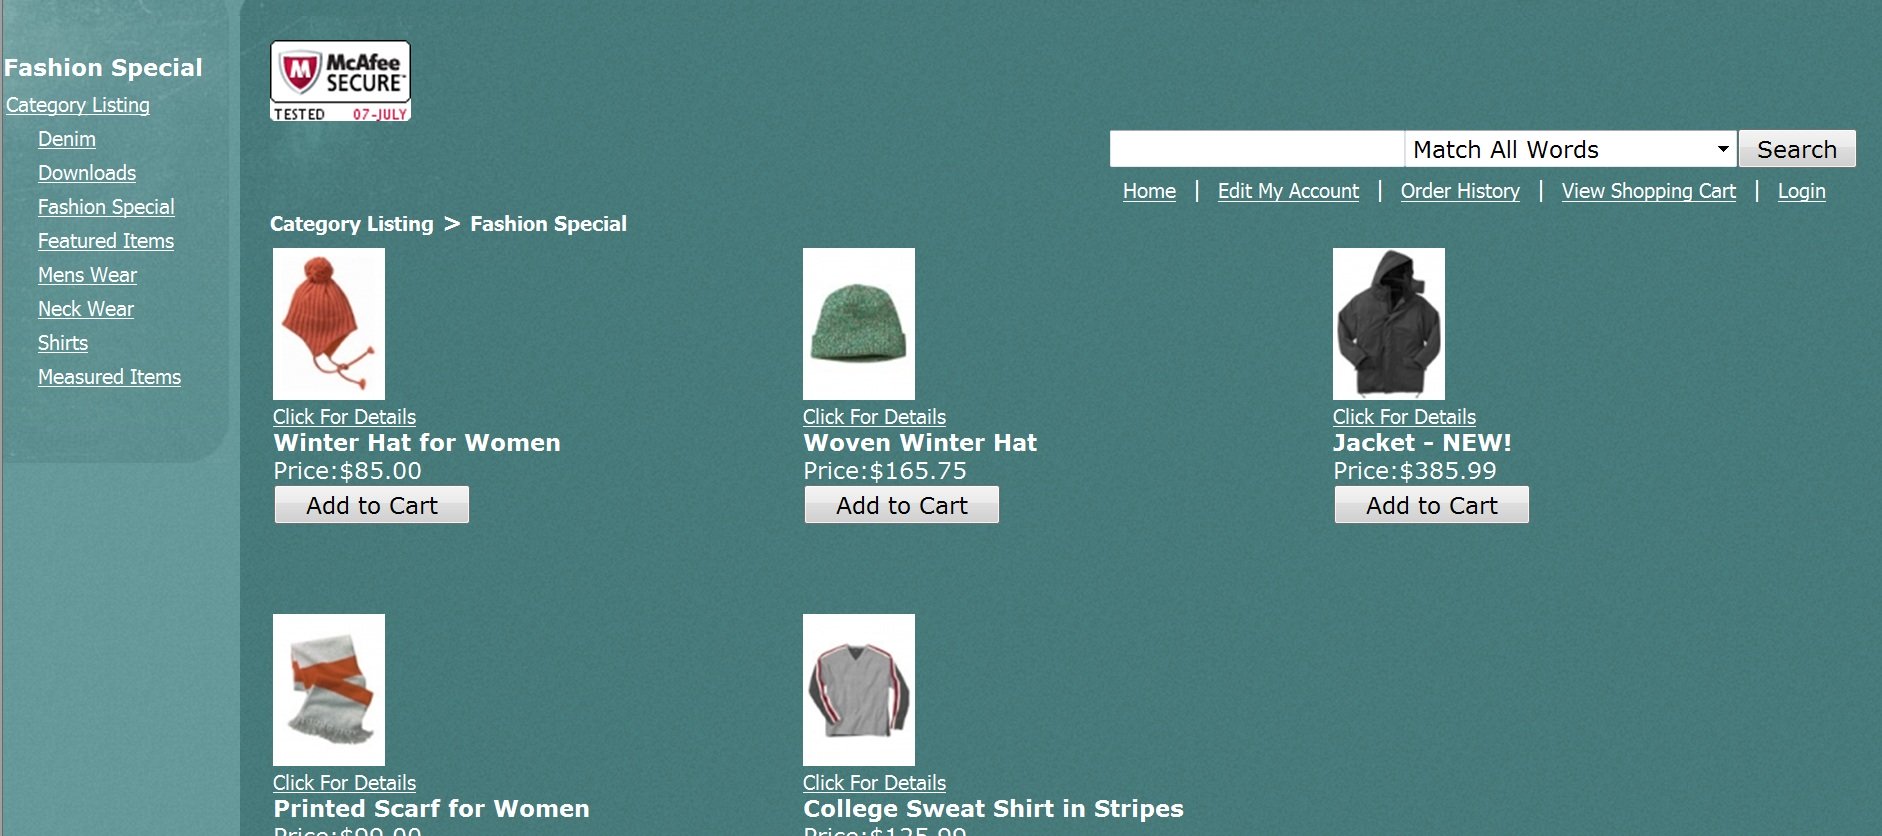
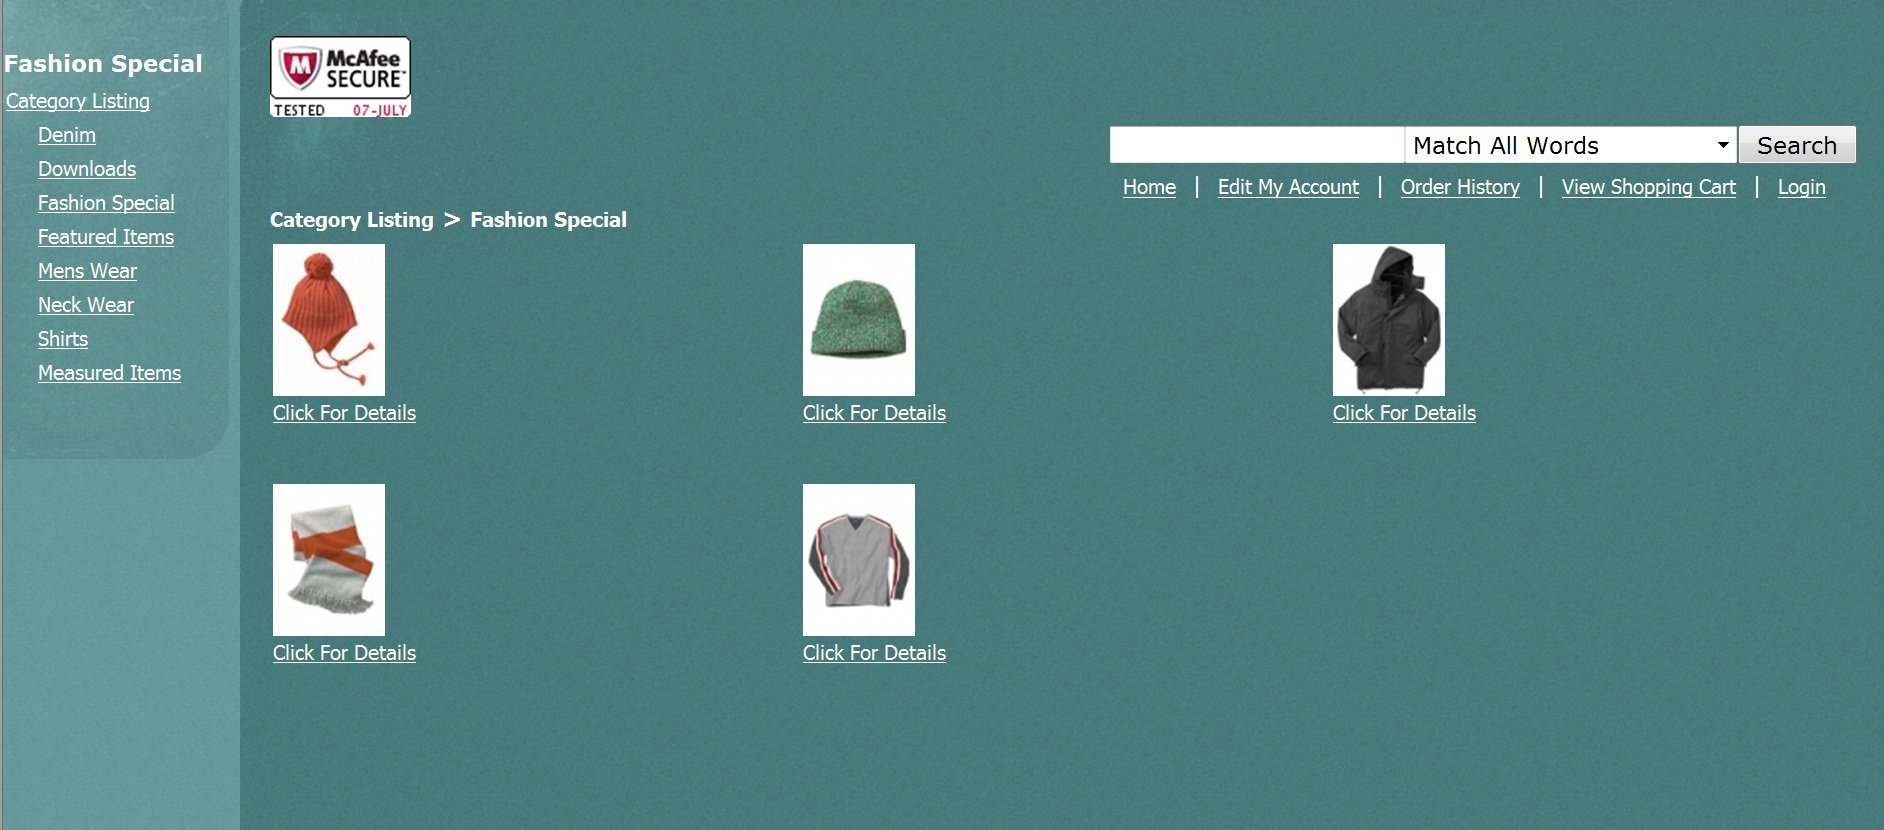
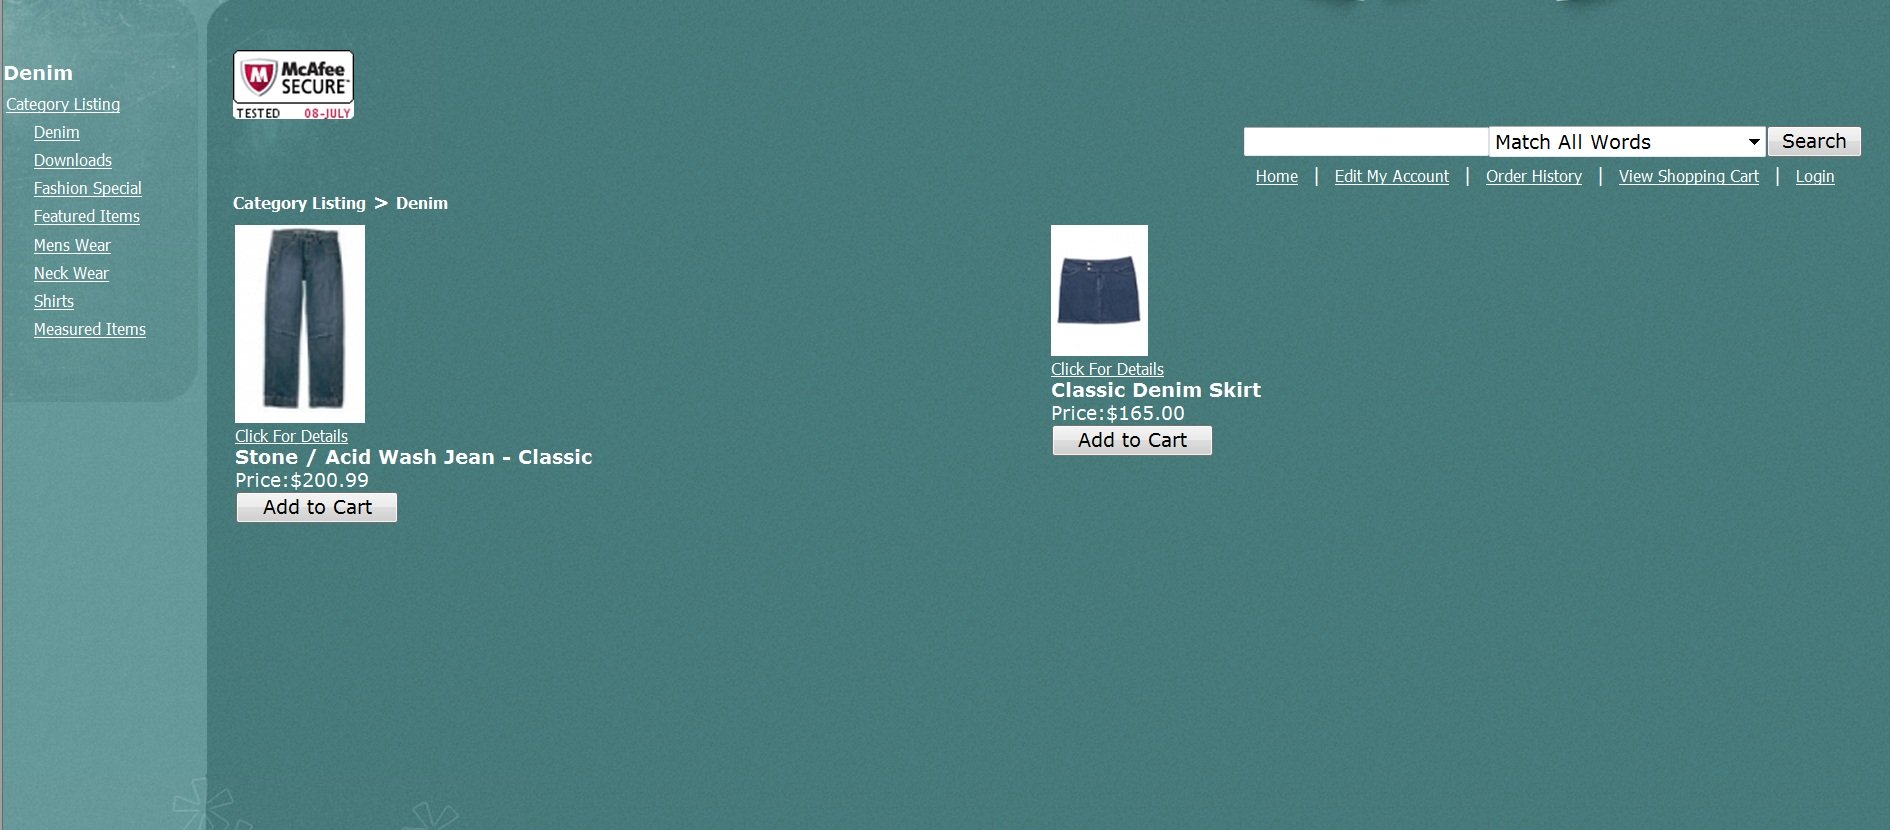
Thumbnail Options This section of the general settings allows you to modify how the items are displayed throughout your shop. Manage > General Settings |
|
|
|
|
|
|
|
|
|
|
Posted in: general_settings
Leave a Comment (0) →|
Search Box Options This section of the general settings allows you to modify your search box options. Manage > General Settings |
|
| Shop Control Panel | |
|
|
Posted in: general_settings
Leave a Comment (0) →You may wish to offer special coupons through different advertising your company does, or would like to sell coupons on your web site. This section will allow you to have a field where those options may be accepted.
To get started, simply click on the 'New' Button
The image to the left show how one sets up a promotional code. In the example, the code has been entered, called 'MagAD223'; this code gives a discount of 10 % off. As you can see, there are 3 separate discount options: % Discount, Flat-rate Discount and Free Shipping.
To the right you see that the 10 % discount code has been entered and applied. The discount is on the products only, not the shipping.
As you can see to the left, you may modify the codes by clicking on the 'Edit', 'Delete' or 'New' buttons once you have created a code.
Posted in: general_settings
Leave a Comment (0) →| You may wish to choose to give your customers additional shipping options. If, for instance, you use ‘Base + fixed amount per item’ as your shipping option you may wish to add an alternate shipping option for ‘Priority Service’ which costs an additional $10.00 per order. Or, you may have your shipping options based on national service and you know you have occasional international customers. You may add an alternate shipping options that includes a markup for packages shipped out of the country. |
||
|
There are 2 fields in this section: Define Options is where you will add, delete or edit your different options. Alternative shipping default text is the text which appears at the top of the |
||
| The screen capture to the right shows the ‘Edit’ or ‘Add’ screen to setup each option. As you can see, there are 3 fields: ‘Option Name’ where you enter the shipping option, like ‘International Orders’ or ‘Next Day Delivery’. You next choose from the drop down menu if the Option price is Added to the previous shipping total, if it Overrides (replaces) the previous shipping total, or if it subtracts. The final field is the amount to change. In this example, we have decided that Next Day Air orders get a flat markup of $15. You can see how it adds this amount in the image of the check-out screen provided to the right. |
||
Posted in: general_settings
Leave a Comment (0) →|
1. No Account setup on check will take the customer from |
|
|
|
|
| So, the customer goes from the above | to here, the customer fills in his or her information and clicks 'Proceed with Checkout' |
|
The customer arrives at the final screen. This |
|
|
2. With the account set up, 1st time customers will: |
|
|
go from here and click 'Checkout' |
To here, where the customer would click the |
|
To here, where the customer will enter: 1. His or her email address 2. Create a password 3. First Name, Last Name, billing and shipping information 4. The customer will also be asked if he or she would like to be added After that information is entered, the customer clicks the 'Proceed With
|
Then the customer arrives at the final screen. |
|
3. When an existing customer returns to your cart, he or she will follow |
|
Posted in: general_settings
Leave a Comment (0) →|
Setting Discounts This section allows you to customize discounts for your shop. This is seperate from Coupon & Promo Codes. Navigation: |
||||||||||||||||||||
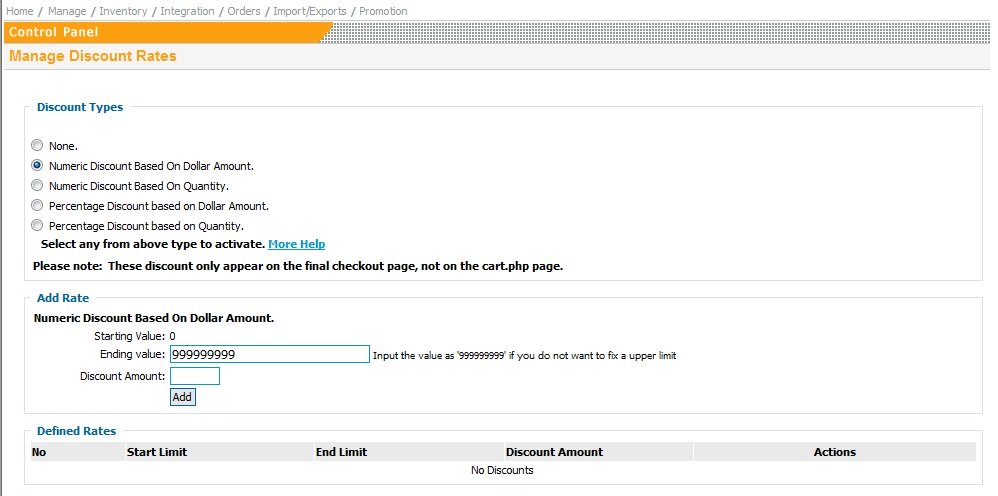 The Thediscounts are a tier system. Starting with 0, you can apply discounts between certain amounts or quantities. The last discount will have an upper limit value of "999999999". You may wish to entice customers to BUY by offering volume discounts. You
|
Posted in: general_settings
Leave a Comment (0) →IMPORTANT NOTE: none of the below information is Legal Advise. It is your responsibility to review any applicable Federal and/or state law regarding the selling and shipping of product. The information below is for the sole purpose of explanation of how the shopping cart software can be utilized.
HOW TO USE THIS SECTION:
This section looks like this:
As you can see, there are 4 separate options:
1. If you are not charging any taxes, choose None
2. If you wish that any taxes you set up in the Edit Location to be based on the address you are Shipping your products to, then choose Shipping.
3. If you wish that any taxes you set up in the Edit Location to be based on the billing address of person ordering, then choose Billing.
4. If you wish to charge taxes on any orders having either their origin or destination in a location where you charge tax, choose Either Shipping or Billing.
AN EXAMPLE: It seems most online business tax on the Shipping address. So, if your business is located in California and you fulfill and order and it ship it to a California address, and you wanted to charge tax, you would choose Shipping.
The other option that some use is ‘Either Shipping or Billing’. In this example, let’s assume your business is based in Florida and you have setup the appropriate tax rate Edit Location. You receive an order from a customer in Miami, FL who is sending the product to a grandson in Atlanta, GA. If you have chosen ‘Either Shipping or Billing’ then the customer would be charged tax. Similarly, if the grandson in Atlanta, GA turns around and purchases a present for his grandmother in Miami, FL, he would be charged tax as well.
Posted in: general_settings
Leave a Comment (0) →
