Shopping Cart Category Options
|
|
||||||||
|
Click on a links below to find instructions for each specific sections.
|
||||||||
Posted in: category
Leave a Comment (0) →Archive for shopmanual
|
|
||||||||
|
Click on a links below to find instructions for each specific sections.
|
||||||||
Posted in: category
Leave a Comment (0) →|
|
||||||||||||
|
Click on a links below to find instructions for each specific sections.
|
||||||||||||
Posted in: newsletter
Leave a Comment (0) →| Edit Pament Help Information This section alllows you to customize the payment methods you accept in the shopping cart. Navigation: |
|
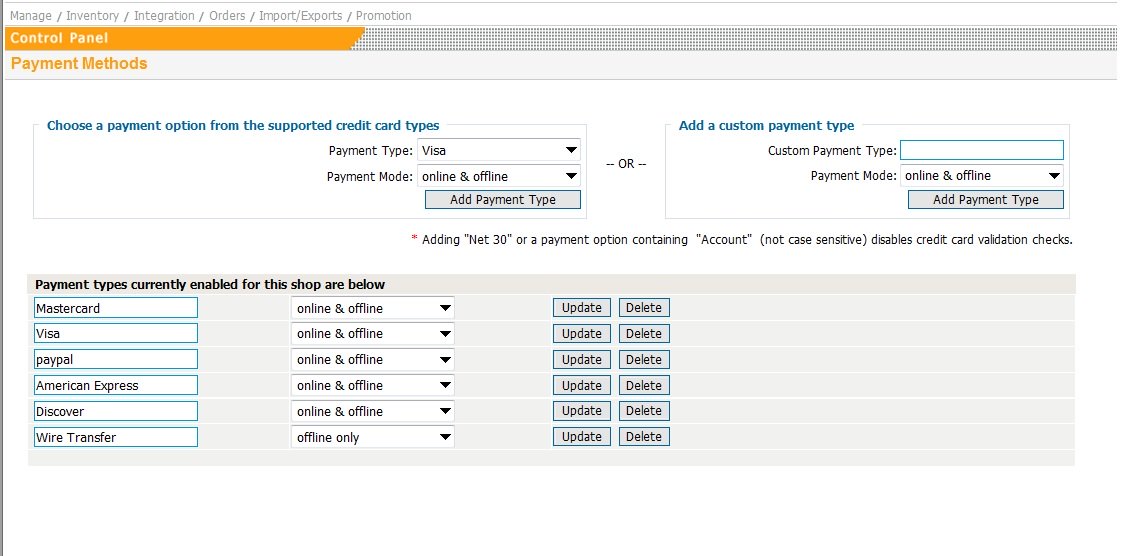 (click here for larger image) Choose a payment option from the suppoted credit card types Payment Type: You may wish to add common payment types. Choose any from the list and click on the ‘Add Payment Type’ Payment Mode: Add a custom payment type Payment types currently enabled for this shop are below |
Posted in: paymenttype
Leave a Comment (0) →| SECTIONS | |
| Sales Graph | Automated Order Transmission |
| Completed Order Options | Configure Stamps.com |
| Export Orders | Order Display Options |
| Orders Page
Navigation: Orders |
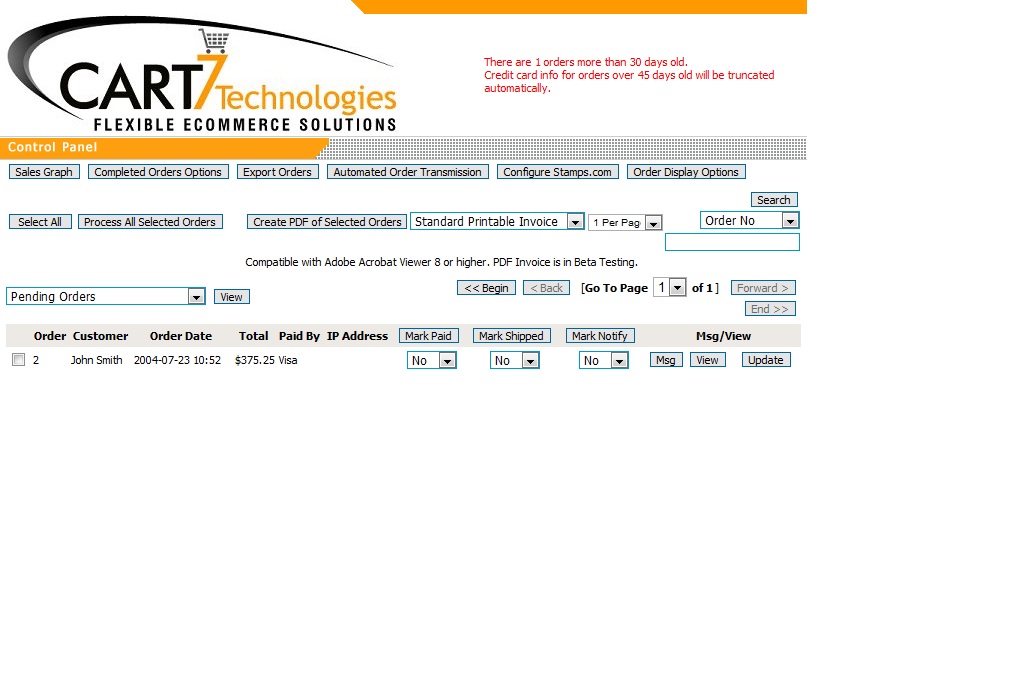 Overview of the Orders Page Overview of the Orders PageThe orders page let’s you see a snapshot of the all your orders that have been placed. Shop owners can update the order status, create printable PDF’s of invoices or packing slips , and create a Message (Msg) that is sent along with the shipment confirmation email. They can also filter the orders in the drop down bar with several options: Update Order Status
Along with this email you can send a message (seen in the top pat of the email). Many shop owners use this feature to send tracking #. Once you have made these changes, you are able to click the "The "Update" button. View Search |
Posted in: shopmanual
Leave a Comment (0) →|
|
||||||||||||
|
Click on a links below to find instructions for each specific sections.
|
||||||||||||
| Inventory Main Page The main Inventory Control allows you to perform a number of functions relating to the items in your inventory Inventory > Inventory Main |
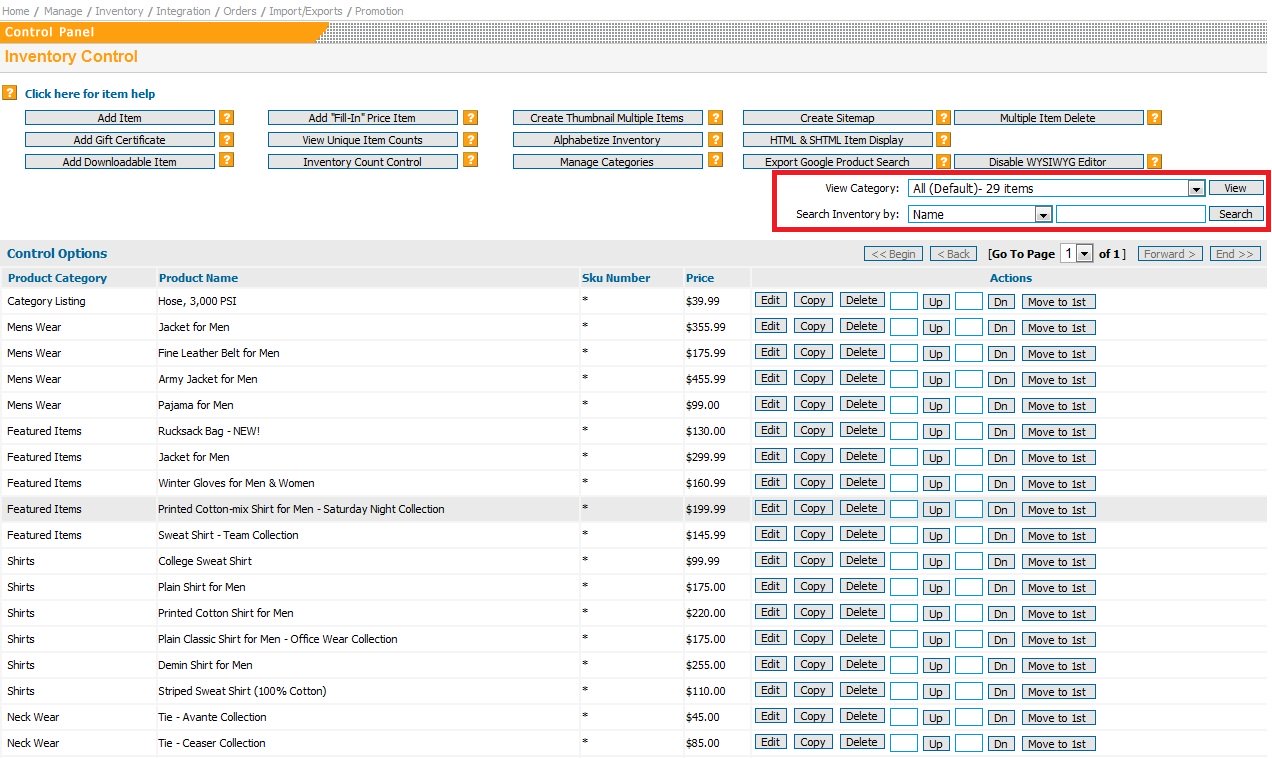 View your items by category View your items by category To narrow you item choices by category, use this function to view the different items Search Inventory by: |
 Edit Item Edit ItemThis is one of the more important links found in the shopping cart. You’ll be able to edit what your item’s name, description, image, etc. Copy Item Delete Item Up/Down Options |
Posted in: setupinv
Leave a Comment (0) →| Introduction: You will be setting up the shopping cart from the shop control panel at http://www.yourdomain.com/shop/owner/ (where ‘yourdomain.com’ is replaced with your actual domain name. The Shop Owner’s control panel is a simple, web-based interface where you can add items and configure your shop).
Please click on the buttons below to learn more about each section of the shopping cart control panel.
|
||||||||||||||||||||||||||||
Posted in: shopmanual
Leave a Comment (0) →