Blog

Archive for shopmanual

Item Images

Item Images Section

Navigation:
Inventory Control > Edit Item > Item Images


Item
Images
Item Images are the images associated with an item. You are
able to have multiple images, and you can create thumbnails (smaller images) for
customers to see your item description better. Thumbnails also can be used for
better browsing of items. Options for thumbnails are found on the ‘General
Settings’ page.

Options

Image URL 

You are able to associate an image with an item by loading it from your website.
Load an image to a unique page anywhere on your website (ex.
www.store.com/image/picture.jpg) and input that image URL into this field. This
will load the image to the shopping cart.

Or Image File Location: 

To load an image that is on your hard drive, click ‘Browse’, find the file, and
click open. When you click ‘Add Image’ below, you will upload the the image.


Resize Image to Pixel Width of:
 
If you would like to resize your image, you are able to do so here. This
is not a required field. Choose the pixel width, and the shopping cart will
resize the image keeping the same proportion.

Create Thumbnail with Pixel width 

To create a thumbanil:
1.  Select the image you would like to use. 
2.  Enter the pixel width you would like for your thumbnail.  This
pixel width needs to be less than the pixel width of the actual image. 
3.  Click add image.

Thumbnails are smaller versions of the image.
Using the thumbnail allows you to have a smaller version of the image for when
customers search for an item.

The shopping cart has differnt thumbnail
settings.  To edit these settings: Manage > General Settings > Thumbnail
Options

If you are looking to create thumbnails for multiple items that
already have an image or have been imported, there is a way to create multiple
thumbnails all at once. Navigate to Inventory > Inventory Main > ‘Create
Thumbnail Multiple Items’

Posted in: setupinv

Leave a Comment (0) →

Checkout Types

This section alllows you to customize the type of checkout you would like to use in your shopping cart.

Navigation:
Manage > Checkout Out Type / Payment Options

Checkout Format
For a shop using the "No account setup on checkout"  format, on a re-order at a later date by a customer who had previously ordered, the shopper would need to re-enter in their address information.

Checkout Type
The Checkout Type field is very important as it determines the credit card merchant that you will be using.   Once you have a credit card merchant that you have signed up with, select your merchant from the drop down menu, and then fill out the required fields.

Which gateways will work with the Precision Web Shopping Cart System?

  1. Optimum Payments – Blue Pay Payment Gateway Easy Payment Gateway Integration
  2. Authorize.net gateway with Merchant Account by GotMerchant.com
  3. Elavon using Virtual Merchant or Elavon using the www.viaKLIX.com gateway. (Available from CostCo.)
  4. Google Checkout
  5. ECHO Online 
  6. SkipJack
  7. CardService International [Using their Linkpoint HTML/Basic interface only]
  8. WorldPay.com  "Junior Select" for Stores Based Outside the U.S.
  9. Paypal‘s Payflow Link Payment Gateway (Previously Verisign Payflow Link)
  10. CentralBancard using the E-xact gateway.
  11. ChronoPay gateway for companies based in Europe
  12. Paypal Payments Pro
  13. Paypal Payments Standard (IPN) 
  14. Transact-Secure
  15. IonGate
    ICommerce
  16. Fast Transact
  17. NMI Gateway Services
  18. Innovative Merchant Services / Intuit 
  19. Checkcare Payment
  20. Net1 / Verus
  21. EWay Australian Gateway, EWay New Zealand GatewayEWay UK Gateway

Detailed help information on several of the merchant can be found at:
http://www.precisionwebhosting.com/shopping_cart_payment.htm#real-time-processing

Third Party Checkout

If Paypal is not your main gateway, you can use PayPal as a "Third Payment Option"
If Google is not your main gateway, you can use Google Checkout as a "Third Payment Option"

If you select ‘Yes’ for either of these options, you will need your Merchant ID and Merchant Key

Miscellaneous Options:
– allow the shipping address to be different then the billing addres
– the minimum checkout amount (default is $1)
– the web page for the Returns policy page
– the text for acknowledging the Returns policy
– whether to email the shop adminstrator or not when an offline order is displayed
Checkout Questions: 
This is a good way to gain customer feedback.  Click the checkbox to require a question to be answered at checkout page.
Cookie Time Out
Cookie based login expires after these many days.

Checkout in Top Frame
Opens the checkout page in top frame

Display Option for User to Enter the Credit Card Security Number in the Checkout Page
Selects the option to turn on / turn off the ccv2 requirement in the checkout process if supported by the payment gateway.

Require ccv2 (3 or 4 digits code) to be input on the checkout page. Option above must also be selected
Toggles javascript validation of ccv2 field in the checkout page if displayed.

Posted in: paymenttype

Leave a Comment (0) →

Drop Down

Drop Down Lists Selection

Navigation:
Inventory Control > Edit Item > DropDown Lists Selection


DropDown
Lists Selection

Level Description

The ‘Level Description’ is the title associated that will be associate with
dropdown option descriptions. Create the level description first, then the
option description(s). For example, "Color" would be the level description, and
the dropdown option description would be "Red" or "Green".

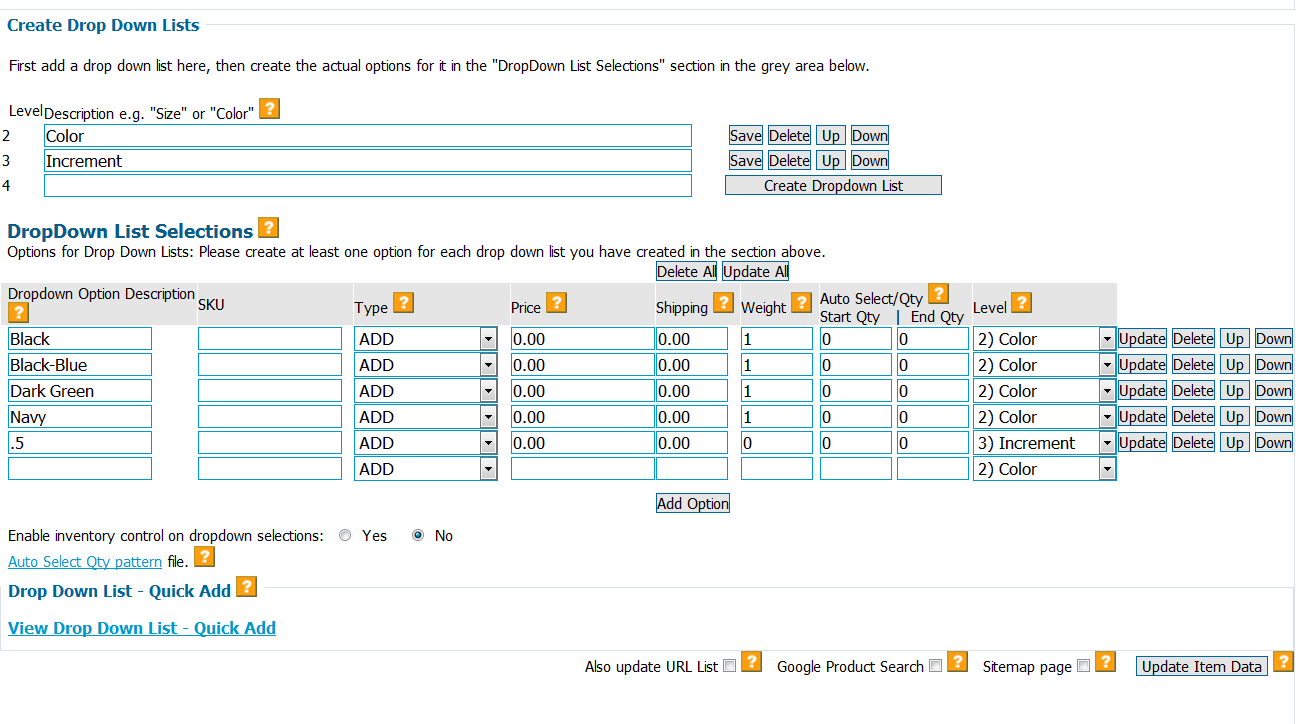
Drop Down Lists Selections 
This function allows you to create dropdown lists for this item only. If you
would like to use the same dropdown list for another item, you can use the copy
item function under Inventory > Inventory Main > ‘Copy Item’ (to the right of an
item). The other option is to export this item’s category under: Import/Exports
> Export Item Data. Open the data to a spreadsheet to find the item’s drop down
list syntax. Then use that syntax in the ‘View Drop Down List – Quick Add’.

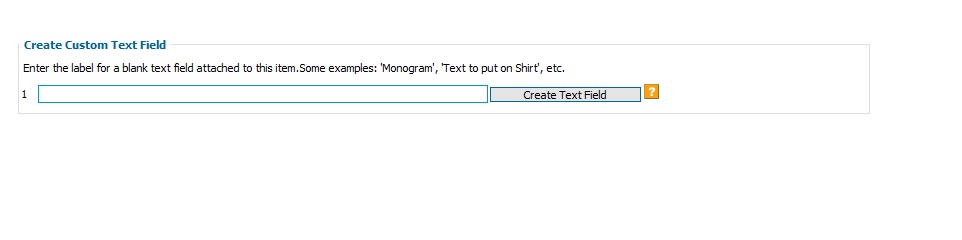
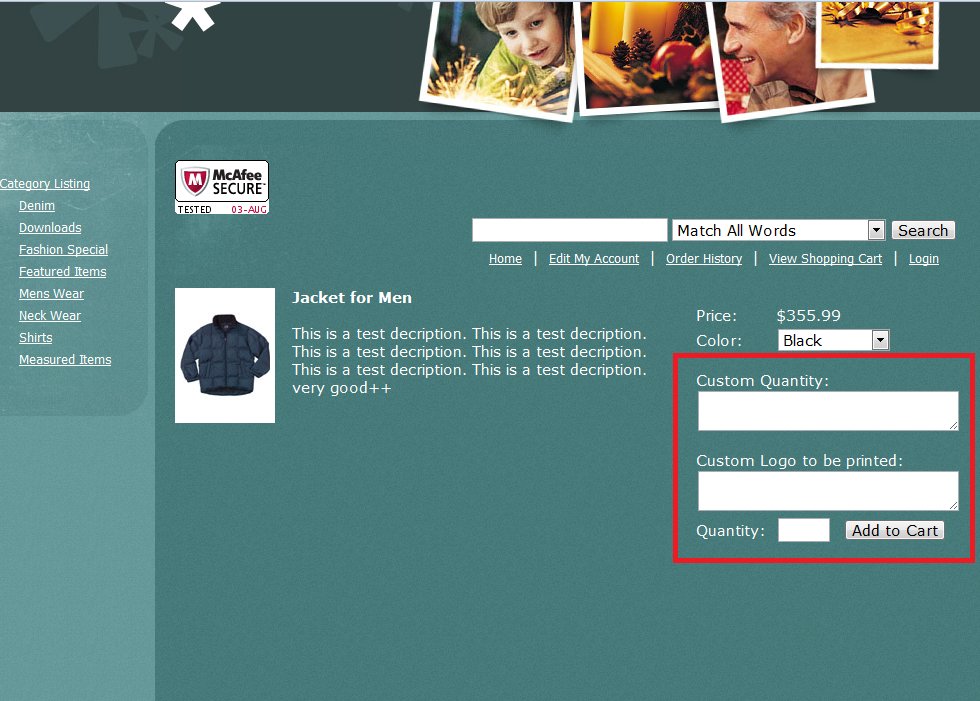
Dropdown Option Description 
This is the description seen by customers as an option under the drop down bar.
If this item was a t-shirt and you had a color green, you would enter ‘Green’.
If you also had color blue, you first need to finish filling out the option for
color green, and then click ‘Add Option’. You then would be able to add color
blue.

Type 
This is the type of adjustment you would like to make for a drop down item. If
you have no adjustment for price or shipping, it won’t matter what you select in
this column. 

Select ‘Add’ to have the the drop down option’s price, shipping, and weight
added to the current item price (Actual Price in Cart). 

Select ‘Subtract’ to have the the drop down option’s price, shipping, and weight
subtracted from the current item price (Actual Price in Cart). 

Select ‘Override’ to have the the drop down option’s price, shipping, and weight
override the current item price (Actual Price in Cart). 

Select ‘Multiply’ to have the the drop down option’s price, shipping, and weight
multiplied by the current item price (Actual Price in Cart).
— An example of a website that uses the multiply feature is a mattress company.
When the size of the mattress increases in thickness, they can multiply the
price by 2, 3, 4, etc.

Price 
The price adjustment of the dropdown option. Input ‘0’ to disable.

Shipping 
The shipping cost to be adjusted for the dropdown option. Input ‘0’ to disable.

For this to take effect, you would have to use the Shipping option "Base +
Charge specified by items". To edit this setting navigate to: Manage > Shipping.

Weight 
The weight of the dropdown option to be adjusted. Input ‘0’ to disable. 

The weight will affect the item’s shipping cost if you are using one of these
settings: "Base + Calculate Rate UPS, USPS, FedEx or DHL (based on zip codes &
weight)"
"Base + Weight"
To edit this setting navigate to: Manage > Shipping.

Auto Select/Quantity 
These two columns allow you to give quantity discounts on one specific
item. bsp;

View the ‘Auto Select Qty pattern’ file below for an example. 

If a customer purchases the required quantity and the quantity discount in
place, they will automatically receive the appropriate discount without having
to select the quantity in the drop down option bar (hence the title ‘Auto
Select’)

Level
Choose the Level you would like associated with the dropdown description. You
can create this under ‘Create Down Down Lists’ — Level Description.


Drop Down List – Quick Add 
This function allows you to import drop down list options and values. 

One way to create a custom syntax is to navigate to: Import/Exports > Export
Item Data. Export a category with an item you have created by manually adding
your drop down list. Open the data in a spreadsheet to find the item’s drop down
list syntax. Then use that syntax in the field below.

Posted in: setupinv

Leave a Comment (0) →

Multiple Item Delete

Multiple Item Delete 
This page allows you to delete
multiple items at the same time.


Inventory > Inventory Main > Multiple Item Delete


Instructions


Enter your products by SKU or Item ID, and then click search.  Select the
items you would like to delete and then click ‘Delete’.  

Information
This page is useful for deleting
multiple items, but not the place to delete an entire category worth of items.

If you need to delete an entire category worth of items, it is easier to
delete the items under Manage > Categories > Remove Category  

Select the
Category’s items you would like to delete and then select
Remove Category and
Items
or
Remove Items Only

Posted in: setupinv

Leave a Comment (0) →

View Order Page


Export Orders

Navigation:
Orders > Export Orders


Export
Mode Options

There are two ways to select which range of orders
you’d like to export: By "Sequential Range" or by "Order ID Range". You can
select your desired option from the option from "-Mode-" dropdown.


Sequential Range

You can use the "Sequential Range" range option to
display a range of orders without knowing their order numbers. First you’d
select the "Sequential Range" option. Then, for example, to export the 100
oldest orders you would enter 1 as "Start" value and 100 as the "End " value.

Order ID Range
You can use the "Order ID Range"
option to export a group of orders beginning at a specific order id number and
ending at a specific order id. First you’d select the "Order ID Range" option.
Then, for example, to export all the orders with order ids between 1001 and
1100, you would enter 1001 in the "Start" field and 1100 in the "End" field.

Export Format Options

Export to Excel
This function allows you to save to excel seperating 2 files (customer details,
order details).
Export to Excel (Single File)
This function allows you to save a single file with to excel with dimensions.

Export to Excel (Single File – Without Dimensions)

This function
allows you to save a single file with to excel without dimensions.

Export to Excel (Single File) Selected Fields only

This function
allows you to save a single file with to excel.
Export to QuickBooks As Invoice
This function
allows you to save 3 files to import into QuickBooks, and the transactions are
saved as an invoice transaction
Export to QuickBooks As Cash Sale
This function
allows you to save 3 files to import into QuickBooks, and the transactions are
saved as a cash sale transaction


Click here for more information on importing into Quickbooks


Other Options

You can also use the links in the "Export All Pending
Orders" section to export all pending orders. If you have more than 1000 pending
orders, it would be best to export them in groups of 1000.

You can choose
whether to save the file as tab delimited or comma delimited.

Posted in: shopmanual

Leave a Comment (0) →

Custom HTML Options

Custom HTML Options
This section of the
general settings allows you to customize the HTML on your
shopping cart pages.

Manage > General Settings


(click here for larger
image)

Custom HTML Headers & Footers

The HTML header is the HTML above the shopping cart html.

The HTML footer is the HTML below the shopping cart html.

The best way to edit the look of the shopping cart is to use
the Shop
Template
.  The other links  allow you
to further customize the HTML of Headers & Footers for the
following pages:

  • Login
  • Billing Information / Address Page
  • Checkout Page
  • Offline Page
  • Gift Certificate HTML Emails
  • Confirmation Page HTML Fields
  • Request Shipping Quote HTML Fields

To edit HTML on category pages navigate to: Manage
Categories > Edit Category HTML / Title

Text

You also have the ability to edit the text of different
fields throughout the shopping cart.  To edit the text,
find the appropriate page level of the text, find the field,
and then edit the text.


Posted in: general_settings

Leave a Comment (0) →

Add “Fill-In” Price Item

Add "Fill-In" Price Item


The Fill-in price item allows shopper to
specify the amount they will be paying. 

This is useful for donations, auction payments, or anywhere you need to
provide a secure method for accepting variable payment amounts.


Inventory > Inventory Main > Add "Fill-In"
Price Item


Name

Create the item name.

Description

Enter the description of your product this field. The plain text / HTML option
will allow you to enter plain text or HTML code. The WYSIWYG editor give you the
option to edit the text in HTML format.

Display Product in Cart

If set to ‘No’, this item is 
– Not searchable
– Not in the item’s
category
– Available if people have the link
– Available if the link shows up in
search engine
– Available if the item html shows up elsewhere on the site

If option is set to ‘Yes, this item is available throughout the shopping cart
software.

Product Dimensions 

Enter the product dimensions you would use for shipping the product. Typically
you would use the box dimensions for shipping that particular product


Category Selection 

Select the category(ies) you would
like to associate with your item.  Categories are helpful for the customer to
locate your items. 

Google Product
Search Values

For help on Google product search:

http://www.google.com/support/merchants/bin/answer.py?hl=en&answer=160081

Posted in: setupinv

Leave a Comment (0) →

Shopping Cart Newsletter Overview

Customer Newsletter Overview

The Contents tab is where
you are able to create and send the Newsletter. 

Navigation:
Promotion > Customer Newsletter


The
Newsletter page allows you to create/send a newsletter to your current
customers. The shopping cart’s billing page has an option for customers to opt
in as subscribers to the newsletter, and you are able to view the complete list
of subscribers under the "View Subscribers Tab". To select the recipients of the
Newsletter click on the "Lists" tab. To create and send the Newsletter, click on
the "Contents" tab. 

To send a message, the steps are:
1. Click the Lists tab, and select
"Send to shop administrator" and de-select "Send to complete list". This will
allow you to send a test message to just yourself, before sending it to the
complete list.
2. Under the "Contents" tab (this page) you need something in
the subject line and also in the "Newsletter Contents" field. Make sure the
"From Name" and "From Email" appear as you desire.
3. Copy your content from a web page, and paste it in to the "Newsletter
Contents" field (This is the easiest way). Or create your content directly in
the "Newsletter Contents" field.
4. Send the newsletter to yourself to test
it.
5. If all looks good, then under the Lists tab select "Send to complete
list", then back on this page, click the "Send Newsletter" button.

Posted in: newsletter

Leave a Comment (0) →

Shipping Cost Calculations

There are eight different unique settings you can use, the key is choosing the one that works best for you. Please read all the descriptions to discern which will be best for you.

Thresholds:

You may wish to charge a flat rate for orders between certain amounts, like $5 shipping for orders between $0 and $50 dollars and $7.50 shipping for orders between $50.01 and $100. You can accomplish this using the 'Shipping Thresholds' shipping method. Simply click on the 'Edit Thresholds' button and a new window will pop-up. You would enter the Starting and Ending Purchase amounts and the Shipping Charge, then click Update. Click here to see a screen capture with the example amounts above.

Base + Charge specified by items

This shipping option will calculate, using the carriers program, the shipping cost of your customers' orders based on your zip code, the customers' zip codes and the orders' weights.

If you choose this shipping method, you can select UPS shipping options, FedEx shipping options or USPS shipping options.

After choosing this option, simply check the boxes to the left of the options you wish to give to your customers.

You will need to fill in the first field 'Base Charge' and the last field 'Shop Zip Code'.

Fixed Charge per order: Simply enter the charge in the 'Base Charge' field. In this example (to the left) the total shipping charge regardless of the order size would be $2.00.

Base Charge + Fixed Charge Per Item: Simply enter the Base in the 'Base Charge' field and the per item cost in the next field. In this example, the base would be $2.00 plus $1.50 per item. So if your customer ordered 3 items, the shipping would be $2.00 plus $4.50 for a total of $6.50.

Base + Weight: Enter the base in the 'Base Charge' field and the shipping cost per pound in the next field. You must enter the weights for each product in the Inventory Setup. In this example, if a customer ordered 2 items with weights of 3 pounds and 1.5 pounds respectively the charge would be $2.00 base plus $1.50 times 4.5 pounds for a total of $8.75.

Base + Charge Specified by items: As with the Base + Weight, part of this charge will be entered in the Set Up Inventory section. The 'Charge Specified by items' will be entered in the 'Edit Item' page, so this will charge a base price of $2.00 plus whatever you have specified for the items selected. This is a good option for someone selling products that have odd shapes or weigh a great deal or have special shipping requirements.

Base Charge + % of item price: again, the Base Charge would be entered in the first field and the percentage would go in the second field. In this example the base is $2.00 and the percentage is 1.50% of item price. So if the customer were to order 3 items with a combined price of $10.00 the shipping charge would be $2.00 plus $0.15 for a total of $2.15.

The final option is 'Do not charge shipping'. This means no shipping is calculated using these functions. People sometimes use this option is the shipping price is combined into the price of the product or if they use the 'Alternate Shipping Options' only.

Posted in: general_settings

Leave a Comment (0) →

Create Custom Text for your items


Create Custom Text Field

Navigation:
Inventory Control > Edit
Item > Create Custom Text


Custom
Text

This field labels the blank text field
attached to this item. This is useful for custom items where the customer can
choose The customer will see this field on the item page before they add the
item to cart. Some examples would be if you are selling t-shirts: ‘Text to put
on Shirt’, etc.


Posted in: setupinv

Leave a Comment (0) →
Page 2 of 9 12345...»